What Should You Know Before Building?
Before you start, first to know about What is Hackintosh and OpenCore, If you are new to this don’t be scared as 90% of the people in Hackintosh are new and learned throughout their First build by seeking help Online. This Guide is only for those who did build Hackintosh before.
Don’t Expect All the Answers in this Guide, Do Research of your own. The Steps Mentioned in the guide are written in the Simplest Form. Learn from other Guides and Forums because it never hurts to learn.
For this guide we’ll be installing macOS 15 Sequoia, the latest iteration of Apple’s operating system, is now available as a developer beta. If you’re eager to explore the new features on your Hackintosh, this comprehensive guide will walk you through the installation and OpenCore 1.0.1 configuration process for a seamless experience.
Make Sure you are,
- Able to keep Patience.
- Be Very Comfortable About Changing Stuff in your System BIOS/ UEFI menu.
If you are not comfortable with the points mentioned above believe me Hackintosh is not for you. There is Fair Chance that you’ll end up bricking your System. So, Just Save your Headache and Buy nicce thicc MacPro from Apple.
What Hardware do You Need to Accomplish this Mission?🚀
If you don’t have a PC yet, Read this Budget Build Guide for Hardware Recommendation, OR Choosing something other people have success within the Hackintosh community gives a higher rate of your build Success as they can also help you.
HARDWARE WE’LL BE USING IN THIS GUIDE:
- Intel i5 9400F
- 24GB Corsair RAM (3 x 8GB)
- Samsung 980 Evo Plus NVMe (for Hackintosh)
- Crucial MX500 500GB SSD (for windows
- Cooler Master 450W Power Supply
- MSI B360M-PRO-VDH.
- Sapphire 5700XT 8GB
- Apple Magic Keyboard
- Logitech G-PRO Mouse.
- Logitech G433 Headset.
- At least 2 2.0 USB pen drives.
Also, You need working Hackintosh, macOS or Windows System for USB Preparation, I’ll be using my MacBook Air M1 for the Installation process.
What Software we’ll be using throughout this Guide
Good tools make stuff much easier. To edit, you need to use one of these:
- Xcode
- ProperTree
- MaciASL – For Managing ACPI Tables.
- MountEFI – a command-line utility to mount your EFI Partition.
I’ll Attach OpenCore-Starter-Pack software package for people who want to download all Softwares at once. 😂
Downloading macOS FOR INSTALLATION.
Follow the guide below,
or if you don’t want to download installer right now you can go internet recovery path.
Let’s Start With OpenCore Setup Now:
Well, there are a lot of methods all over the internet but we’ll start from Vanilla Installation. Vanilla Installation means nothing is pre-made you have to make your config which will be most compatible with your system. So, let’s get started.
RECOMMENDED BIOS SETTINGS:
The motherboard I’m using is from MSI so I’m mentioning the steps which are on-point for MSI motherboards, If you have different Mother Board the settings are the same but maybe on a different page on your BIOS GUI.
- Settings > Advanced > Integrated Peripherals > Network Stack > Disabled
- Settings > Advanced > Integrated Peripherals > Intel Serial IO > Disabled
- Settings > Advanced > USB Configuration > XHCI Hands-Off > Enabled
- Settings > Advanced > USB Configuration > Legacy USB Support > [AUTO]
- Settings > Advanced > Windows OS Configuration > MSI FastBoot > [Disabled]
- Settings > Advanced > Windows OS Configuration > FastBoot > [Disabled]
- Overclocking > Extreme Memoery Profile (X.M.P) > [Enabled]
- Overclocking > CPU Features > Intel Virtualization Tech > [Enabled]
- Overclocking > CPU Features > Intel V-td Tech > [Disabled]
- Settings > Boot > Boot Mode Select > [UEFI]
CONFIGURING OPENCORE EFI FOLDER:
In this step, we’ll configure OpenCore from Top to bottom to boot our system for Installing macOS Sequoia. So let’s start with Downloading OpenCore. At the time of writing the Latest Release is 1.0.0 of OpenCore Bootloader but we are using Nightly Edition i.e. 1.0.1. you can also download from here.
Unzip the Downloaded Files and Reconstruct the Directory as Follows.
| Opencore EFI Folder Untouched | Opencore EFI Folder Cleaned Up with Necessary Files |
|---|---|
 |  |
LET’S COLLECT THE FILES:
Let’s Start by Downloading the Kexts,
AppleALC.kext – AUDIO – Link
Lilu.kext – PLUGIN FOR VARIOUS GPUS ETC– Link
RaedeonBoost.kext – MAINLY USED FOR HIGH-END AMD GPUS FOR FULL POWER – Link
RealtekRTL8111.kext – ETHERNET – Link
VirtualSMC.kext – PROCESSOR – Link
SMCProcessor.kext – PROCESSOR, VIRTUALSMC PLUGIN – Link
SMCSuperIO.kext – PROCESSOR, VIRTUALSMC PLUGIN – Link
XHCI-unsupported.kext – USB – Link
WhateverGreen.kext – DISPLAY – Link
DRIVERS:
Delete All the Content Of Drivers Folder except OpenRuntime.efi and Download these two additional Drivers for APFS and HFS Drives.
HFSPlus.efi – HFS DRIVES – Link
ACPI FILES:
According to Official Documentation, we need 4 Files for Our 9th Generation CoffeeLake Refresh Processor.
SSDT-PLUG – CPU MANAGEMENT
SSDT-EC-USBX – USB POWER MANAGEMENT
SSDT-AWAC – REAL-TIME CLOCK ~ RTC
SSDT-PMC – NVRAM MANAGEMENT
Patch DSDT/SSDTs with MaciASL or ProperTree to resolve compatibility issues with your motherboard and CPU. We did this in last article, please refer to this to obtain your SSDT’s.
also, you need to map your USB for Hackintosh from Windows before installing Hackintosh.
Setting Up config.plist
For this Particular file grab the SampleConfig.plist and Place it in your OC Folder like this.

Download and Open ProperTree.command

Select your config.plist by going to File > Open

Then Select Your config.plist File,
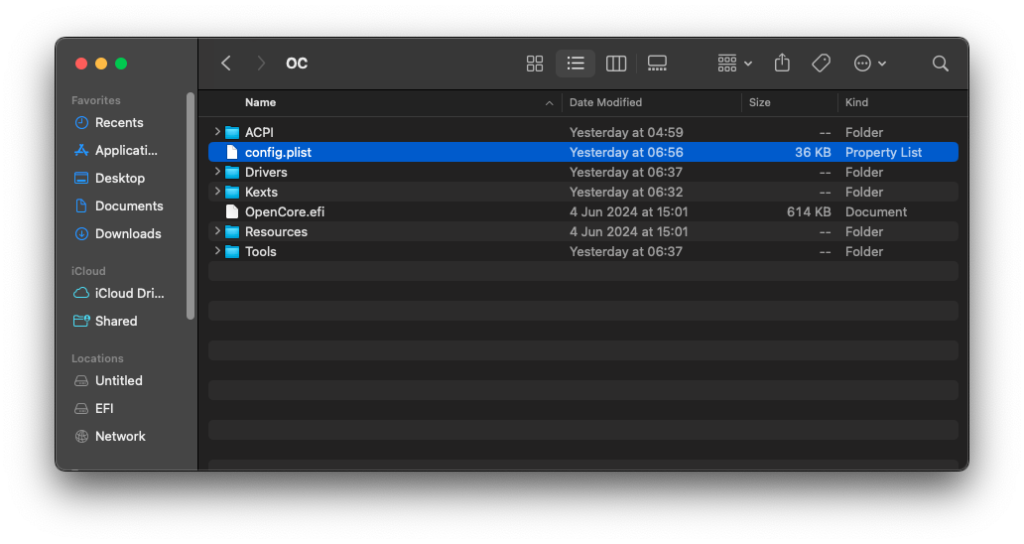
After selecting your config.plist, Go to File then OC Clean Snapshot. OR
Press This Button Combination on Your Keyboard.
COMMAND + SHIFT + R
and Choose your OC Folder.

This Command will Clean Your config.plist file and add the kexts, drivers and ACPI changes to your File.
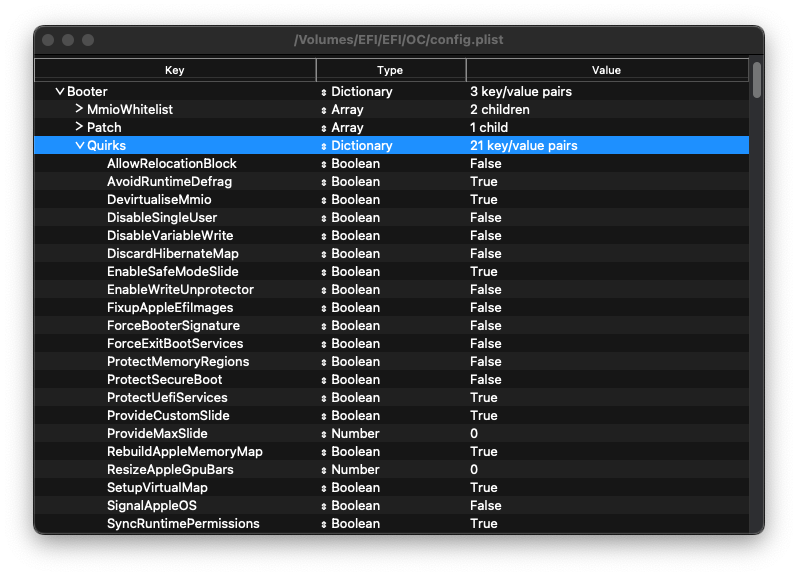
Booter Section Of ProperTree (Opencore)

- Go to the quirks Section and expand it.

- Change the following:
DevirtualiseMmio - TRUE
EnableWriteUnprotector - FALSE
ProtectUefiServices - TRUE
RebuildAppleMemoryMap - TRUE
SyncRuntimePermissions - TRUE
Done.
Device Properties Section ProperTree (Opencore)
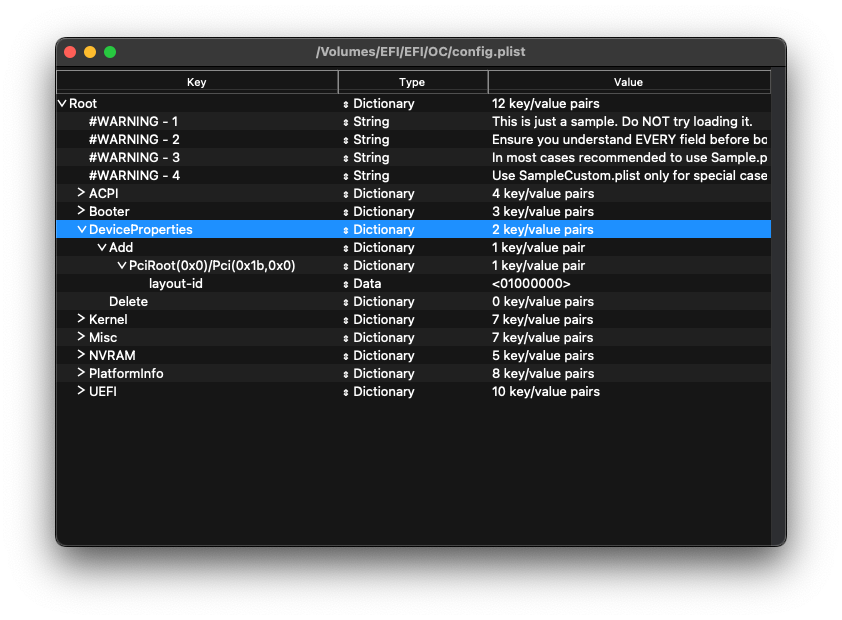
In this section we have to define our iGPU since the build we are doing is 9400F, which doesn’t have iGPU so we can skip this section. If your CPU have iGPU eg. Intel HD, Intel UHD etc. check the Dortania guide.
Kernel Section ProperTree (Opencore)

Now go to Quirks Section
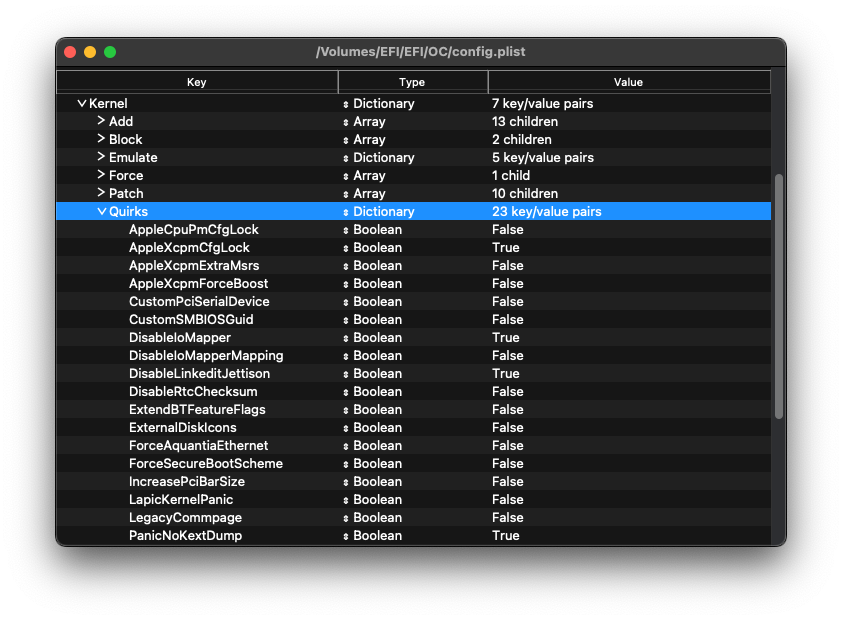
Change the following:
AppleXcpmCfgLock – TRUE
CustomSMBIOSGuid – FALSE
DisableIoMapper – TRUE
LapicKernelPanic – FALSE
PanicNoKextDump – TRUE
PowerTimeoutKernelPanic – TRUE
XhciPortLimit – FALSE
MISC Section ProperTree (Opencore)
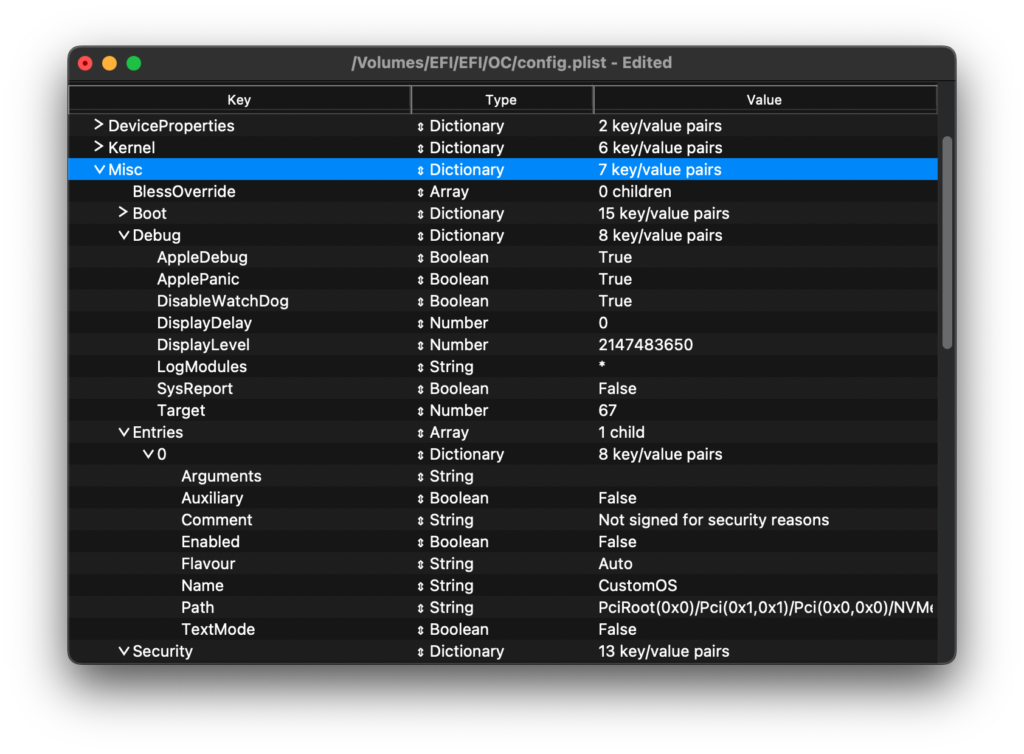
Go to Debug Section:

Change the Following:
AppleDebug – TRUE
ApplePanic – TRUE
Target – 67
SECURITY Section Under MISC Section
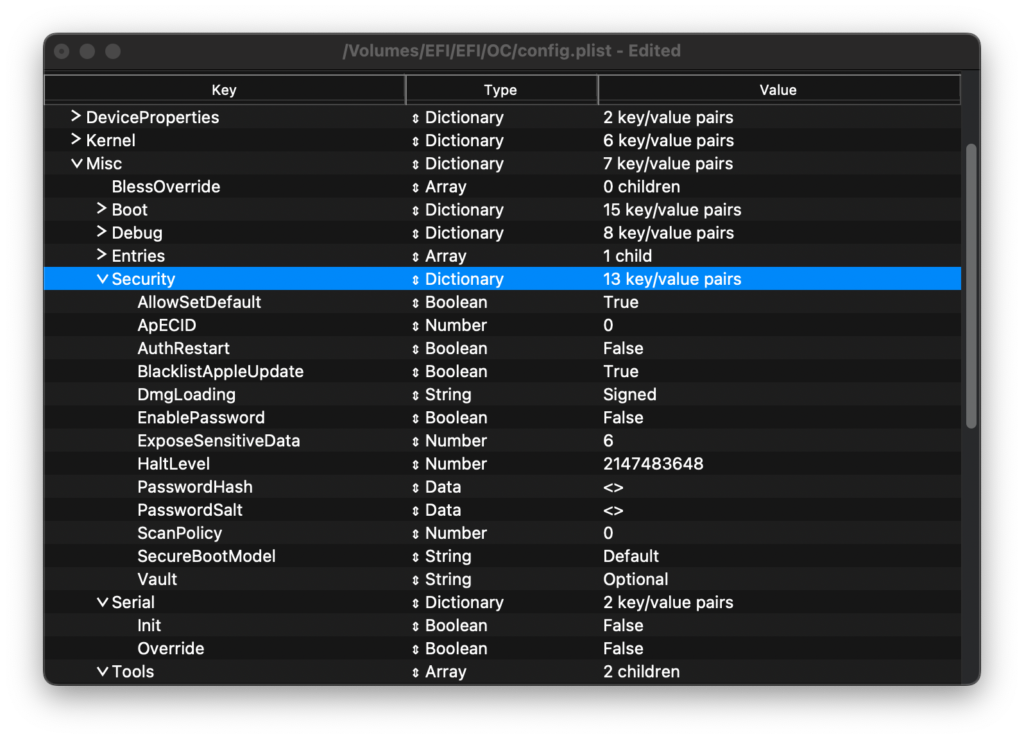
Change the following:
AllowSetDefault – TRUE
BlacklistAppleUpdate – TRUE
ScanPolicy – 0
SecureBootModel – DEFAULT
VAULT – Optional (Case Sensitive)
NVRAM Section ProperTree (Opencore)
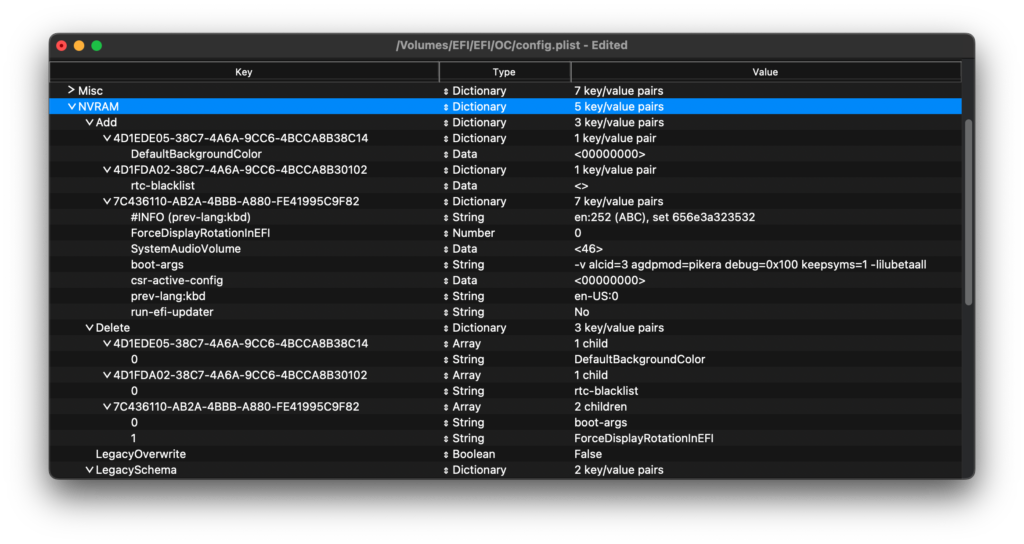
Under ADD > 7C436110-AB2A-4BBB-A880-FE41995C9F82 Change the following,
boot-args = -v alcid=3 agdpmod=pikera debug=0x100 keepsyms=1 -lilubetaall
prev-lang:kbd – Change data type to String and Value – en-US:0
Now Restart and Boot From USB.
Platform Info Section ProperTree (Opencore)
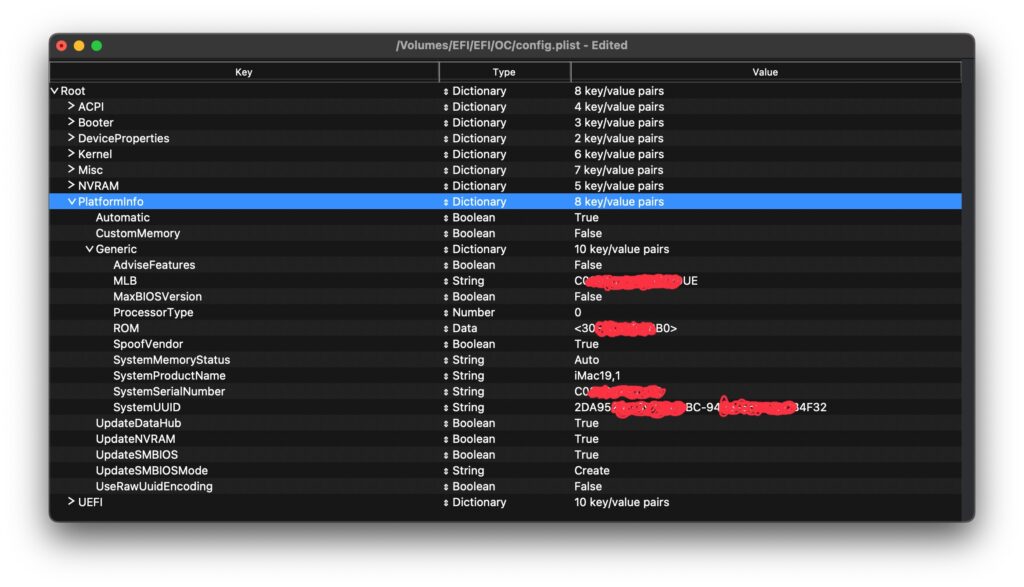
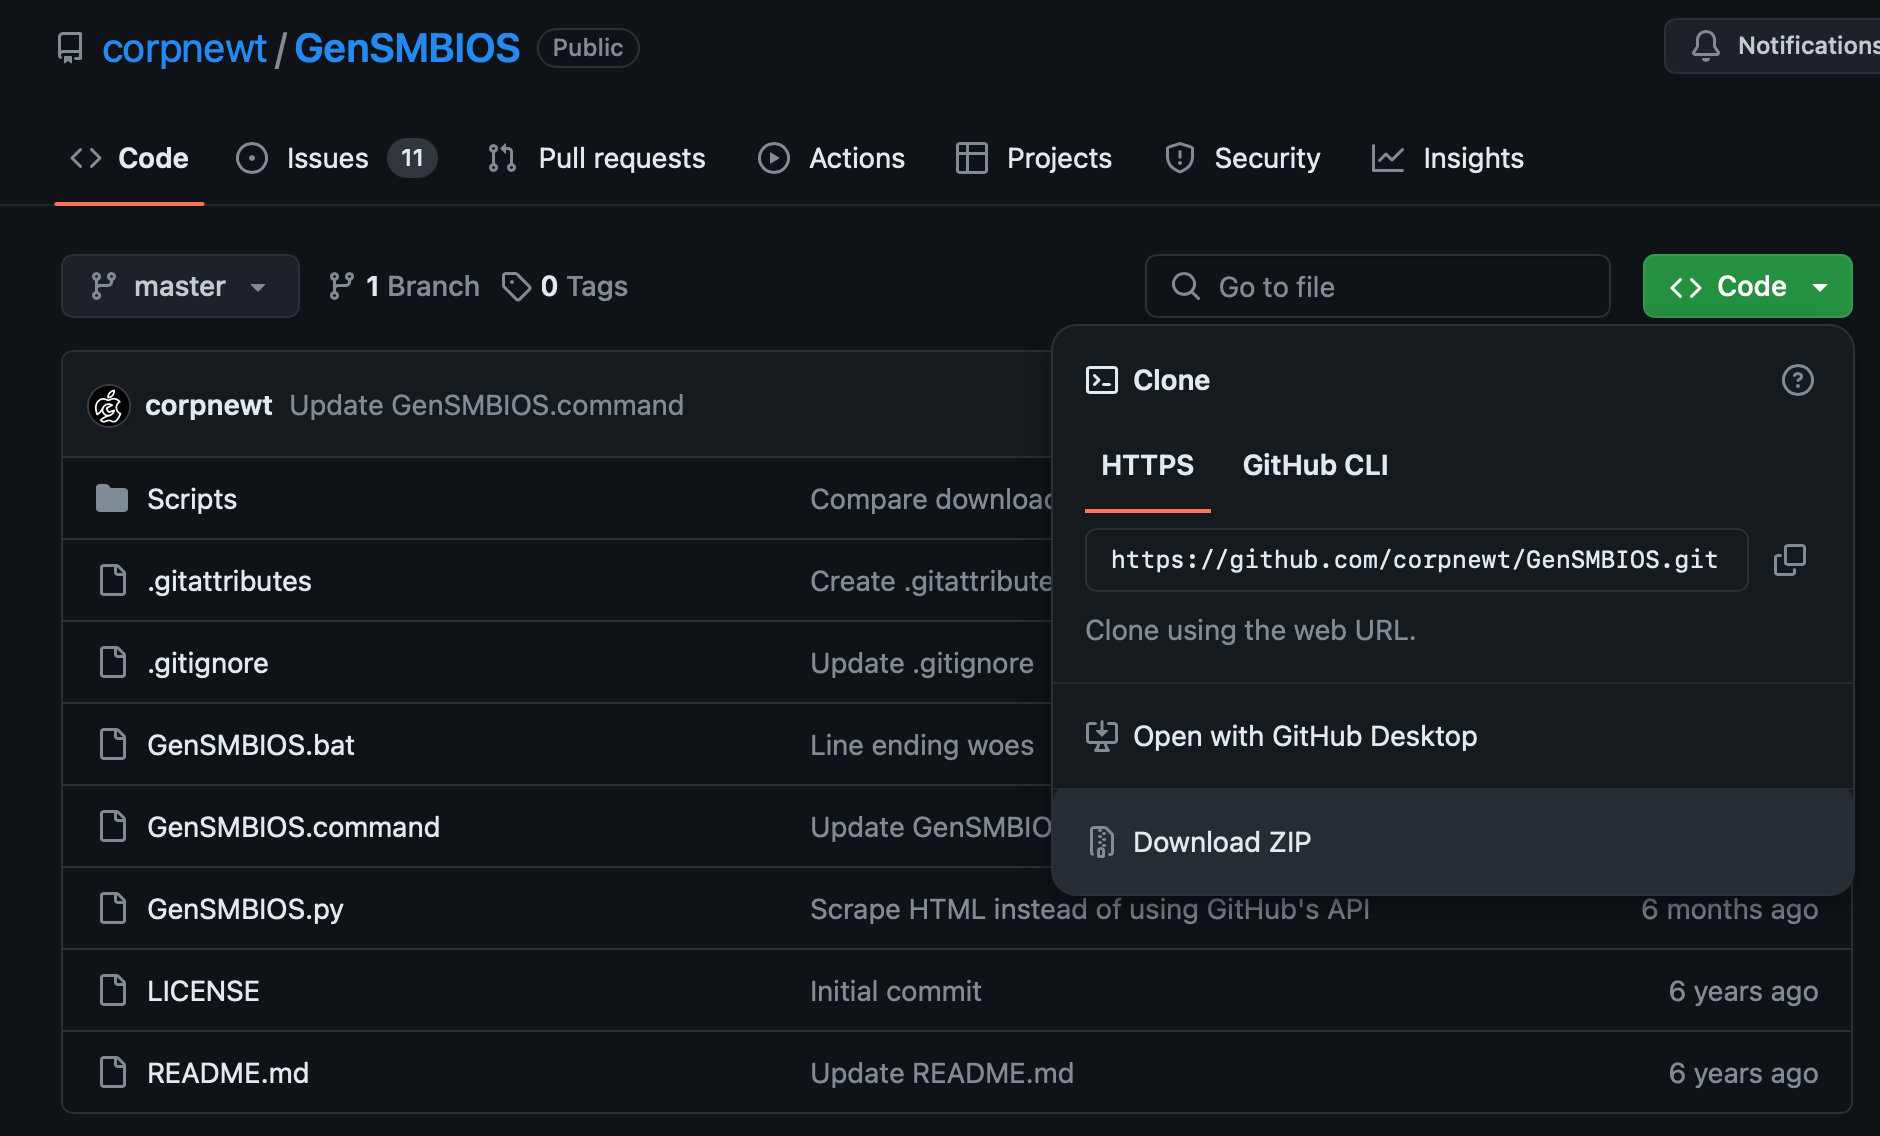
Now you need to setup the SMBIOS info, for this we’ll use tool called GenSMBIOS by CorpNewt.
- Download the Zip from Github.

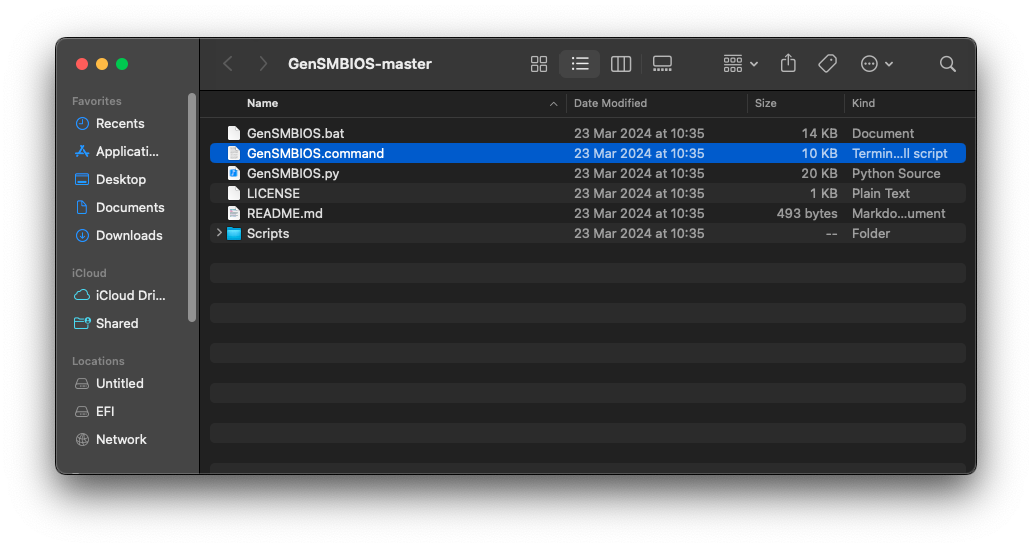
- Unzip the Downloaded Folder and and open the file inside it called
GenSMBIOS.command
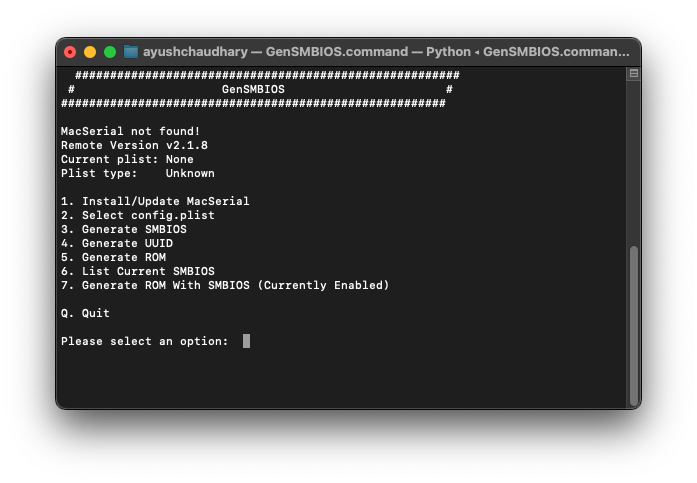
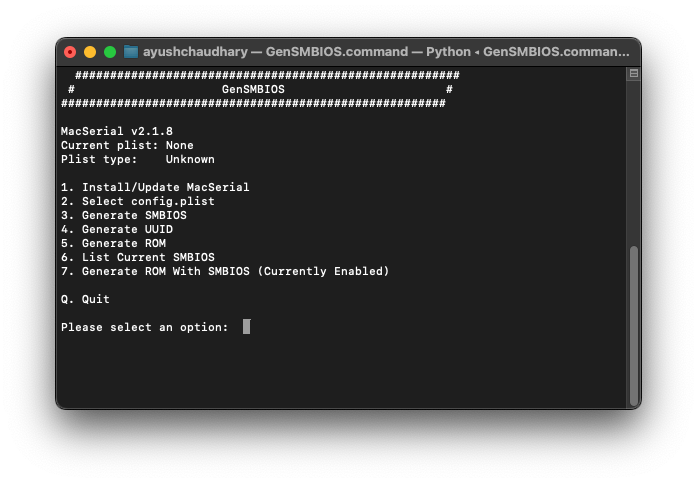
- You’ll be Greeted by this Screen

- Press 1 and
ENTERto install MacSerial
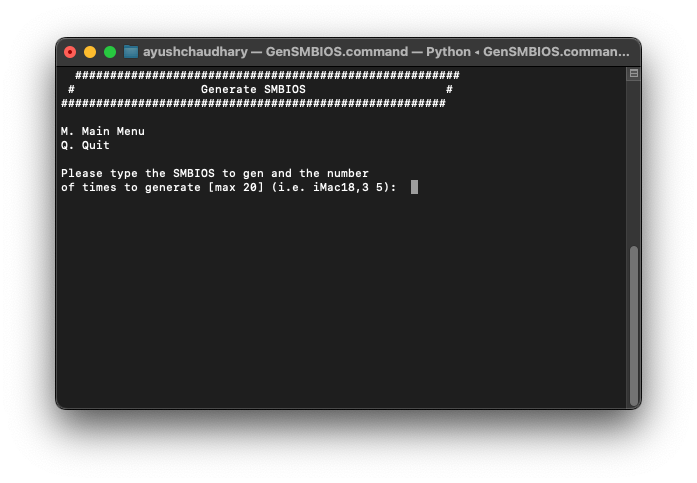
- Now Press
3. generate SMBIOSthenENTER
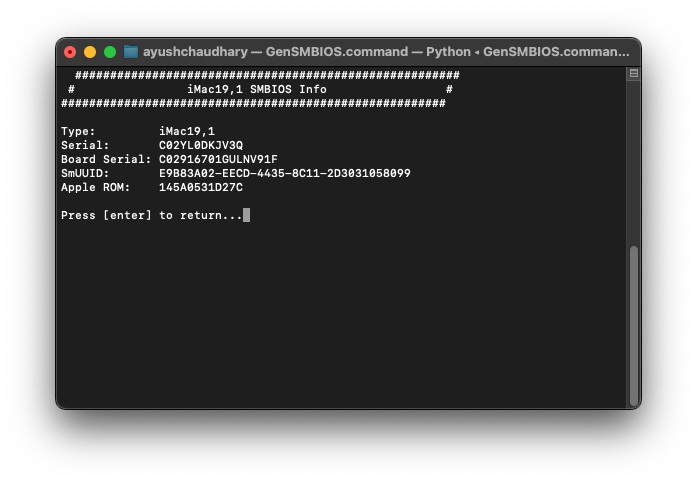
- Now Enter the Model for your Hackintosh, I have i5 9th get processor so closest real Mac to this is iMac19,1 and you’ll get SMBIOS Info for your Hackintosh.
PLEASE CHECK THE Serial number with apple website and make sure it shows invalid
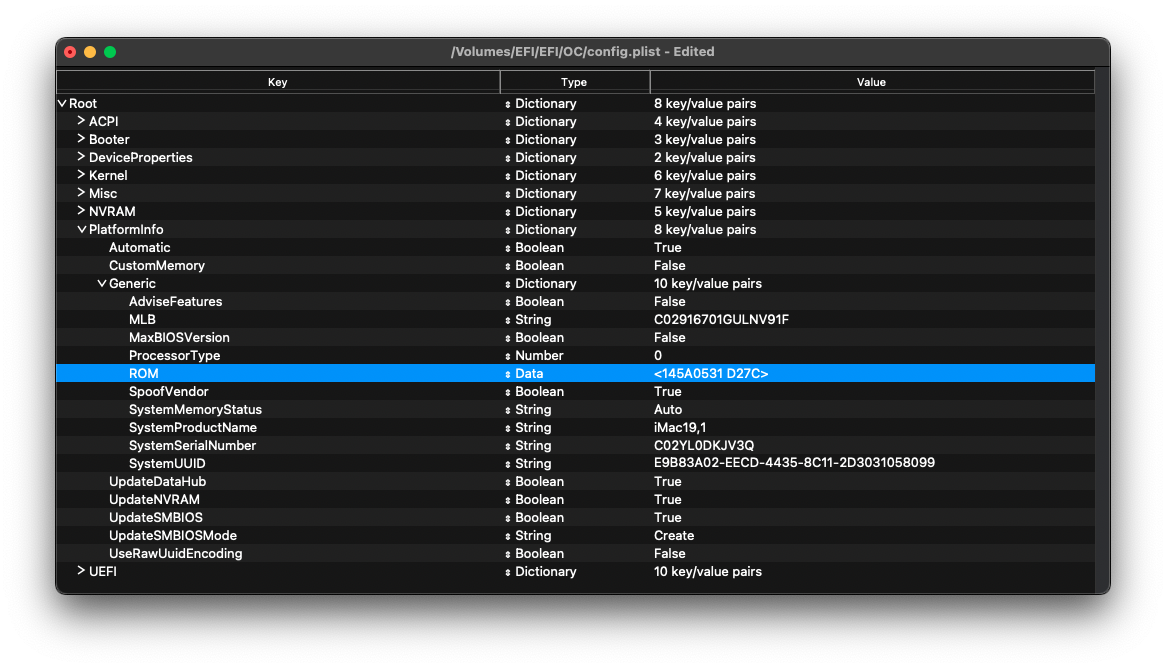
- Now we have to put all the data generated from GenSMBIOS to our config.plist using ProperTree.
TheTypepart gets copied to Generic -> SystemProductName.
TheSerialpart gets copied to Generic -> SystemSerialNumber.
TheBoard Serialpart gets copied to Generic -> MLB.
TheSmUUIDpart gets copied to Generic -> SystemUUID.
The Apple ROM part gets copied to Generic -> ROM
like this,
Done.
UEFI Section ProperTree (Opencore)

- Go to APFS -> MinDate = -1 and MinVersion = -1
- Done.
INSTALLING macOS:
- Create the bootable usb using this guide.
Post – Installation:
Mount EFI Partition: Mount the EFI partition of your installation drive.
Copy EFI Folder: Copy the EFI folder from your USB installer to your installation drive’s EFI partition.
Lets Dive In.
Booting macOS without USB Drive:
Download and run MountEFI by CorpNewt.
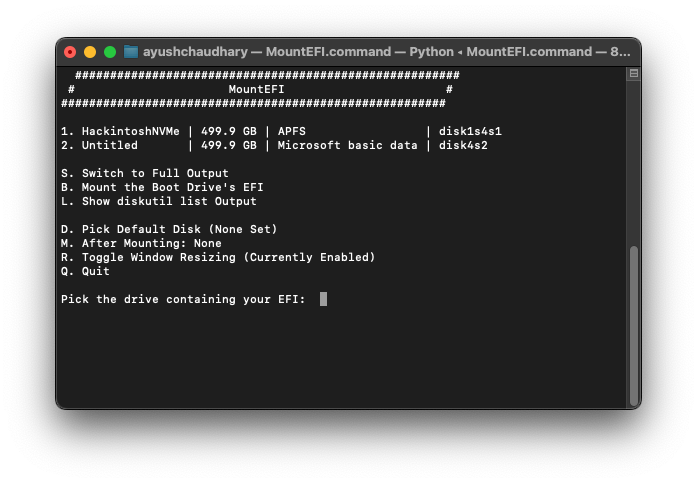
Type the Number of your Internal SSD and press ENTER.
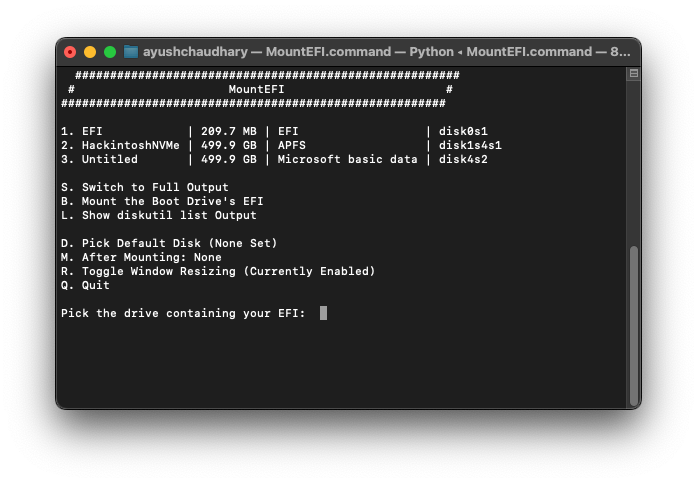
Now copy the All Contents Of your USB’s EFI partition to Internal Drive’s EFI partition.
Reboot without USB Drive.
My EFI FOLDER for REFERENCE ONLY. If you use it on your main Hackintosh, please change the SMBIOS Section.
https://github.com/ayushere/i5-9400F-Sequoia-Opencore-EFI
Now. Test All Other things like DRM, Audio, iMessage, FaceTime. Most Probably It’ll be working.
