The ACPI folder in OpenCore can be overwhelming, right? Packed with SSDTs (Secondary System Description Tables), it’s not easy to wonder which ones are actually necessary for your Hackintosh.
The truth is, there’s no one-size-fits-all answer. The specific SSDTs you need depend entirely on your hardware (your motherboard, CPU, etc.). Some even require extra configuration to work properly.
Instead of giving you a generic list that might lead you astray, we’re going to focus on how to find the right SSDTs for your specific setup. We’ll dive into your OpenCore config.plist and explore the ACPI section, where you’ll discover which SSDTs are essential for your Hackintosh to run smoothly.
Below are the tables extracted from the Dortania OpenCore guide, check for your CPU platform and we’ll create the SSDT files after this.
Consumer Grade Desktop:
| Platforms | CPU | EC | AWAC | NVRAM | USB |
|---|---|---|---|---|---|
| Penryn | N/A | SSDT-EC | N/A | N/A | N/A |
| Lynnfield & Clarkdale | N/A | SSDT-EC | N/A | N/A | N/A |
| Sandy Bridge | CPU-PM | SSDT-EC | N/A | N/A | N/A |
| Ivy Bridge | CPU-PM | SSDT-EC | N/A | N/A | N/A |
| Haswell | SSDT-PLUG | SSDT-EC | N/A | N/A | N/A |
| Broadwell | SSDT-PLUG | SSDT-EC | N/A | N/A | N/A |
| Skylake | SSDT-PLUG | SSDT-EC-USBX | N/A | N/A | N/A |
| Kaby Lake | SSDT-PLUG | SSDT-EC-USBX | N/A | N/A | N/A |
| Coffee Lake | SSDT-PLUG | SSDT-EC-USBX | SSDT-AWAC | SSDT-PMC | N/A |
| Comet Lake | SSDT-PLUG | SSDT-EC-USBX | SSDT-AWAC | N/A | SSDT-RHUB |
| Rocket Lake | SSDT-PLUG | SSDT-EC-USBX | SSDT-AWAC | N/A | SSDT-RHUB |
| Alder Lake | SSDT-PLUG | SSDT-EC-USBX | SSDT-AWAC | N/A | SSDT-RHUB |
| Raptor Lake | SSDT-PLUG | SSDT-EC-USBX | SSDT-AWAC | N/A | SSDT-RHUB |
High-End Desktop:
| Platforms | CPU | EC | RTC | PCI |
|---|---|---|---|---|
| Nehalem & Westmere | N/A | SSDT-EC | N/A | N/A |
| Sandy Bridge-E | N/A | SSDT-EC | N/A | SSDT-UNC |
| Ivy Bridge-E | N/A | SSDT-EC | N/A | SSDT-UNC |
| Haswell-E | SSDT-PLUG | SSDT-EC-USBX | SSDT-RTC0-RANGE | SSDT-UNC |
| Broadwell-E | SSDT-PLUG | SSDT-EC-USBX | SSDT-RTC0-RANGE | SSDT-UNC |
| Skylake-X | SSDT-PLUG | SSDT-EC-USBX | SSDT-RTC0-RANGE | N/A |
Mobile Devices (Laptop)
| Platforms | CPU | EC | Backlight | I2C Trackpad | AWAC | USB | IRQ | NVRAM | IMEI |
|---|---|---|---|---|---|---|---|---|---|
| Clarksfield and Arrandale | N/A | SSDT-EC | SSDT-PNLF | N/A | N/A | N/A | IRQ-SSDT | N/A | N/A |
| Sandy Bridge | CPU-PM | SSDT-EC | SSDT-PNLF | N/A | N/A | N/A | IRQ-SSDT | N/A | SSDT-IMEI |
| Ivy Bridge | CPU-PM | SSDT-EC | SSDT-PNLF | N/A | N/A | N/A | IRQ-SSDT | N/A | SSDT-IMEI |
| Haswell | SSDT-PLUG | SSDT-EC | SSDT-PNLF | SSDT-GPI0 | N/A | N/A | IRQ-SSDT | N/A | N/A |
| Broadwell | SSDT-PLUG | SSDT-EC | SSDT-PNLF | SSDT-GPI0 | N/A | N/A | IRQ-SSDT | N/A | N/A |
| Skylake | SSDT-PLUG | SSDT-EC-USBX | SSDT-PNLF | SSDT-GPI0 | N/A | N/A | N/A | N/A | N/A |
| Kaby Lake | SSDT-PLUG | SSDT-EC-USBX | SSDT-PNLF | SSDT-GPI0 | N/A | N/A | N/A | N/A | N/A |
| Coffee Lake | SSDT-PLUG | SSDT-EC-USBX | SSDT-PNLF | SSDT-GPI0 | SSDT-AWAC | N/A | N/A | SSDT-PMC | N/A |
| Comet Lake | SSDT-PLUG | SSDT-EC-USBX | SSDT-PNLF | SSDT-GPI0 | SSDT-AWAC | N/A | N/A | N/A | N/A |
| Ice Lake | SSDT-PLUG | SSDT-EC-USBX | SSDT-PNLF | SSDT-GPI0 | SSDT-AWAC | SSDT-RHUB | N/A | N/A | N/A |
After selecting your platform, cheak for the files you need to proceed. for example,
I’m using i5 9400F. It’s a 9th Gen Processor and Coffee Lake Platform. So the Files I Needed are,
| Platform | CPU | EC | AWAC | NVRAM | USB |
|---|---|---|---|---|---|
| Coffee Lake | SSDT-PLUG | SSDT-EC-USBX | SSDT-AWAC | SSDT-PMC | N/A |
So, Let’s start with the first file, SSDT-PLUG but before that, we need DSDT of our current firmware.
What is DSDT and How do we get a copy of our DSDT?
If you’re venturing into the exciting world of Hackintosh, you’ve probably come across the term “DSDT.” But what is it, and why is it crucial for a seamless macOS experience on your custom-built machine? Let’s dive in and uncover the secrets of DSDT.
Understanding the DSDT
At its core, the DSDT (Differentiated System Description Table) is a fundamental component of your Hackintosh build. Think of it as a translator that bridges the gap between your computer’s hardware and the macOS operating system. It provides macOS with essential information about your motherboard’s components, ensuring smooth communication and optimal functionality.
Why You Need a DSDT
The DSDT is the linchpin for achieving hardware compatibility in your Hackintosh. Without a properly configured DSDT, you’ll likely encounter issues such as:
- Kernel panics: Sudden system crashes due to incompatible hardware.
- Sleep/wake problems: Difficulty putting your Hackintosh to sleep or waking it up.
- Device malfunctions: USB ports, audio, Wi-Fi, or other hardware components not working correctly.
- Performance limitations: Your Hackintosh may not perform at its full potential.
Finding and Implementing Your DSDT
Fortunately, obtaining and implementing a DSDT is easier than you might think:
- Pre-built DSDTs: For popular motherboards, you can often find pre-patched DSDTs online within the Hackintosh community. This is the simplest and most convenient option but we are not using this option here as we are seeking maximum compatibility.
- DSDT Extraction and Patching: If a pre-built DSDT isn’t available for your motherboard, you can extract your own using tools like SSDTTime and MaciASL . Then, you’ll need to patch it using manual methods.
Once you have your SSDT’s, place it in the ACPI folder of your bootloader (OpenCore or Clover) to ensure it’s loaded during the boot process.
Important Considerations
- Technical Know-How: Working with DSDTs requires some technical knowledge, but with the abundance of resources and guides available online, even beginners can learn the ropes.
- Backup Your Original DSDT: Always make a backup of your original DSDT before making any changes. This will allow you to revert if something goes wrong.
The Benefits of a Well-Configured DSDT
A properly configured DSDT unlocks the full potential of your Hackintosh, providing:
- Enhanced stability: Fewer crashes and smoother operation.
- Improved power management: Better sleep/wake functionality and energy efficiency.
- Full hardware compatibility: All your devices work as intended.
- Optimized performance: Your Hackintosh runs at its peak performance.
so let’s start with dumping our DSDT from SSDTTime.
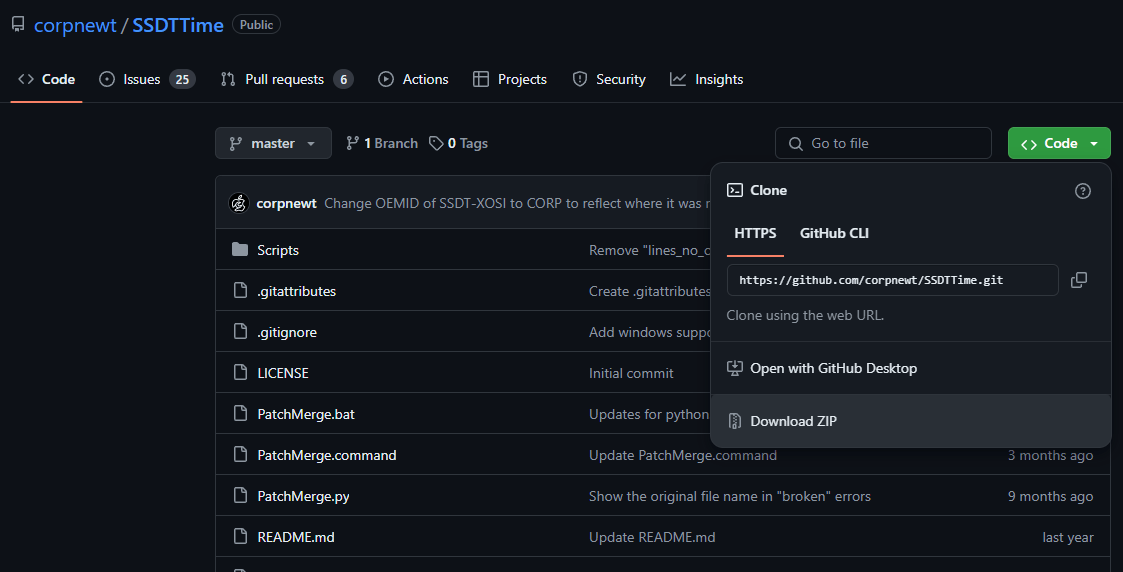
- Download SSDTTime Binary from GitHub.

- Extract to Zip File to your Desktop.

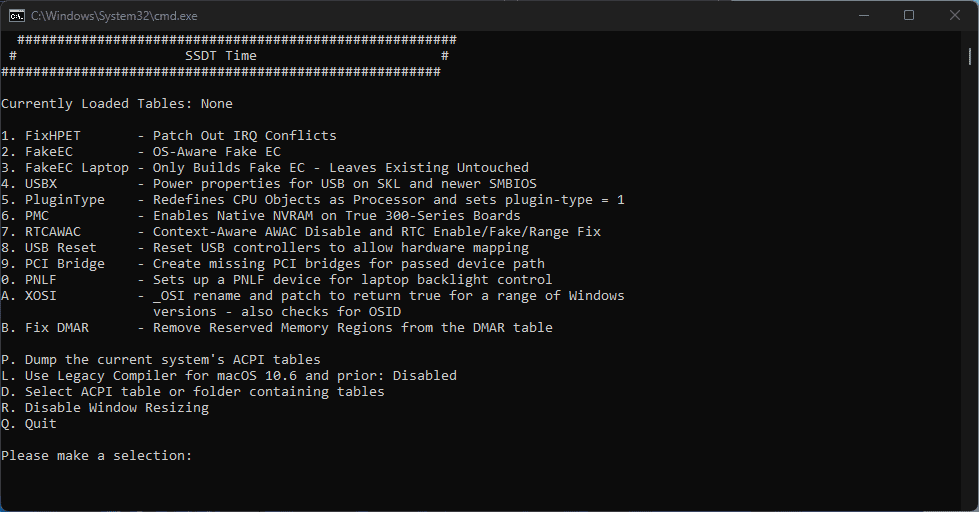
- Right-click on SSDTTime.bat and open as Administrator.

- You’ll be greeted by this screen.

- Now press P to Dump the system’s current ACPI Tables and after successful dump you’ll get this screen.

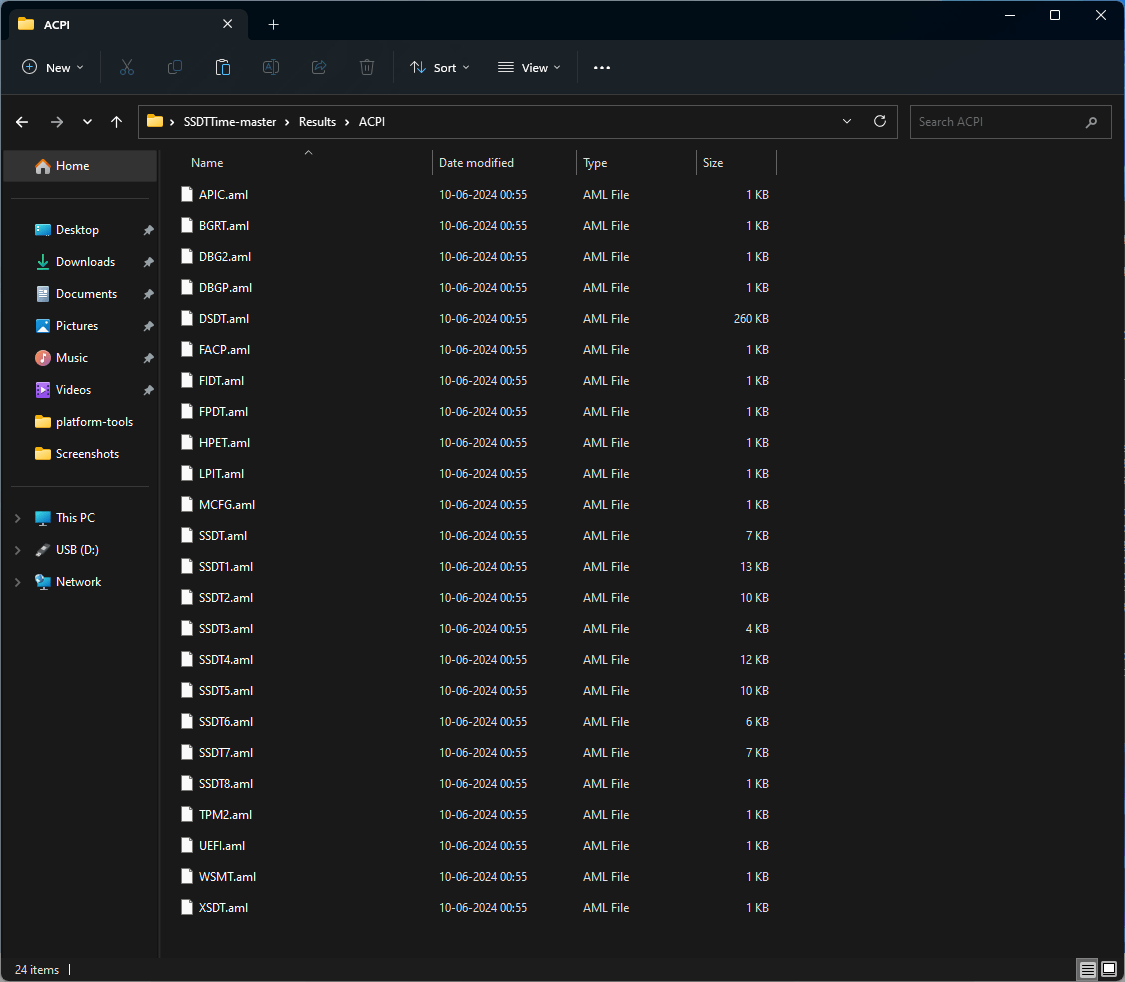
- Now open the SSDTTime folder which we extracted on the desktop, you’ll find a new folder named ACPI (populated with your system’s ACPI tables).

Congratulations, you’ve successfully dumped your DSDT.
Compiling & Decompiling DSDT.
for macOS it’s pretty straightforward, download and open MaciASL App and to compile or decompile just go to,
File > Save As > file.aml and File Format as ACPI Machine Laguage Binary (.AML)
but here we are using Windows 11 to Compile and Decompile our ACPI Tables, follow the simple steps below.
- Download iasl.exe and put it on the desktop inside the new folder.

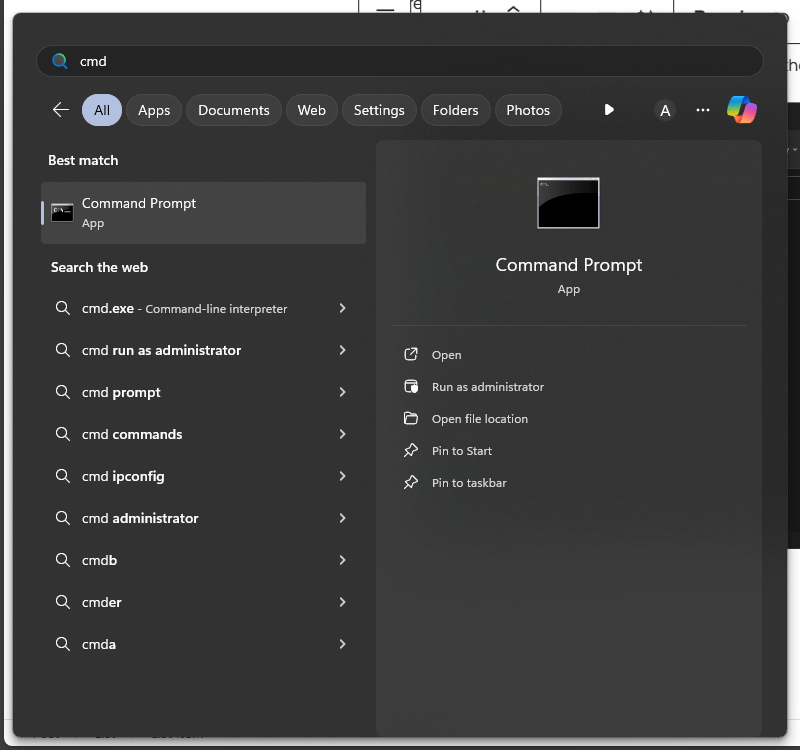
- Now click start and type cmd (Command Prompt)

- Now drag and drop the iasl.exe then space then drag and drop the DSDT.aml then press Enter.

- If the Compile is successful you’ll get a decompiled DSL file or vice versa.
SSDT-PLUG
SSDT-PLUG enables your computer’s operating system to directly control your CPU’s power usage, resulting in better energy efficiency and performance. This is highly desirable as it allows your system to optimize power consumption based on your workload, saving energy when idle and boosting performance when needed.
for this step you can use MaciASL if you are in macOS, in our case we are using Windows 11 so it’s fairly simple.
- Open Device Manager and Search for Processors.
- Open the first one then click on Details Tab.
- From the Property Drop Down Menu, Click on BIOS Device Name.

Check If the Value ends with 00 or the lowest value, if not check on another processor from the Device Manager list.
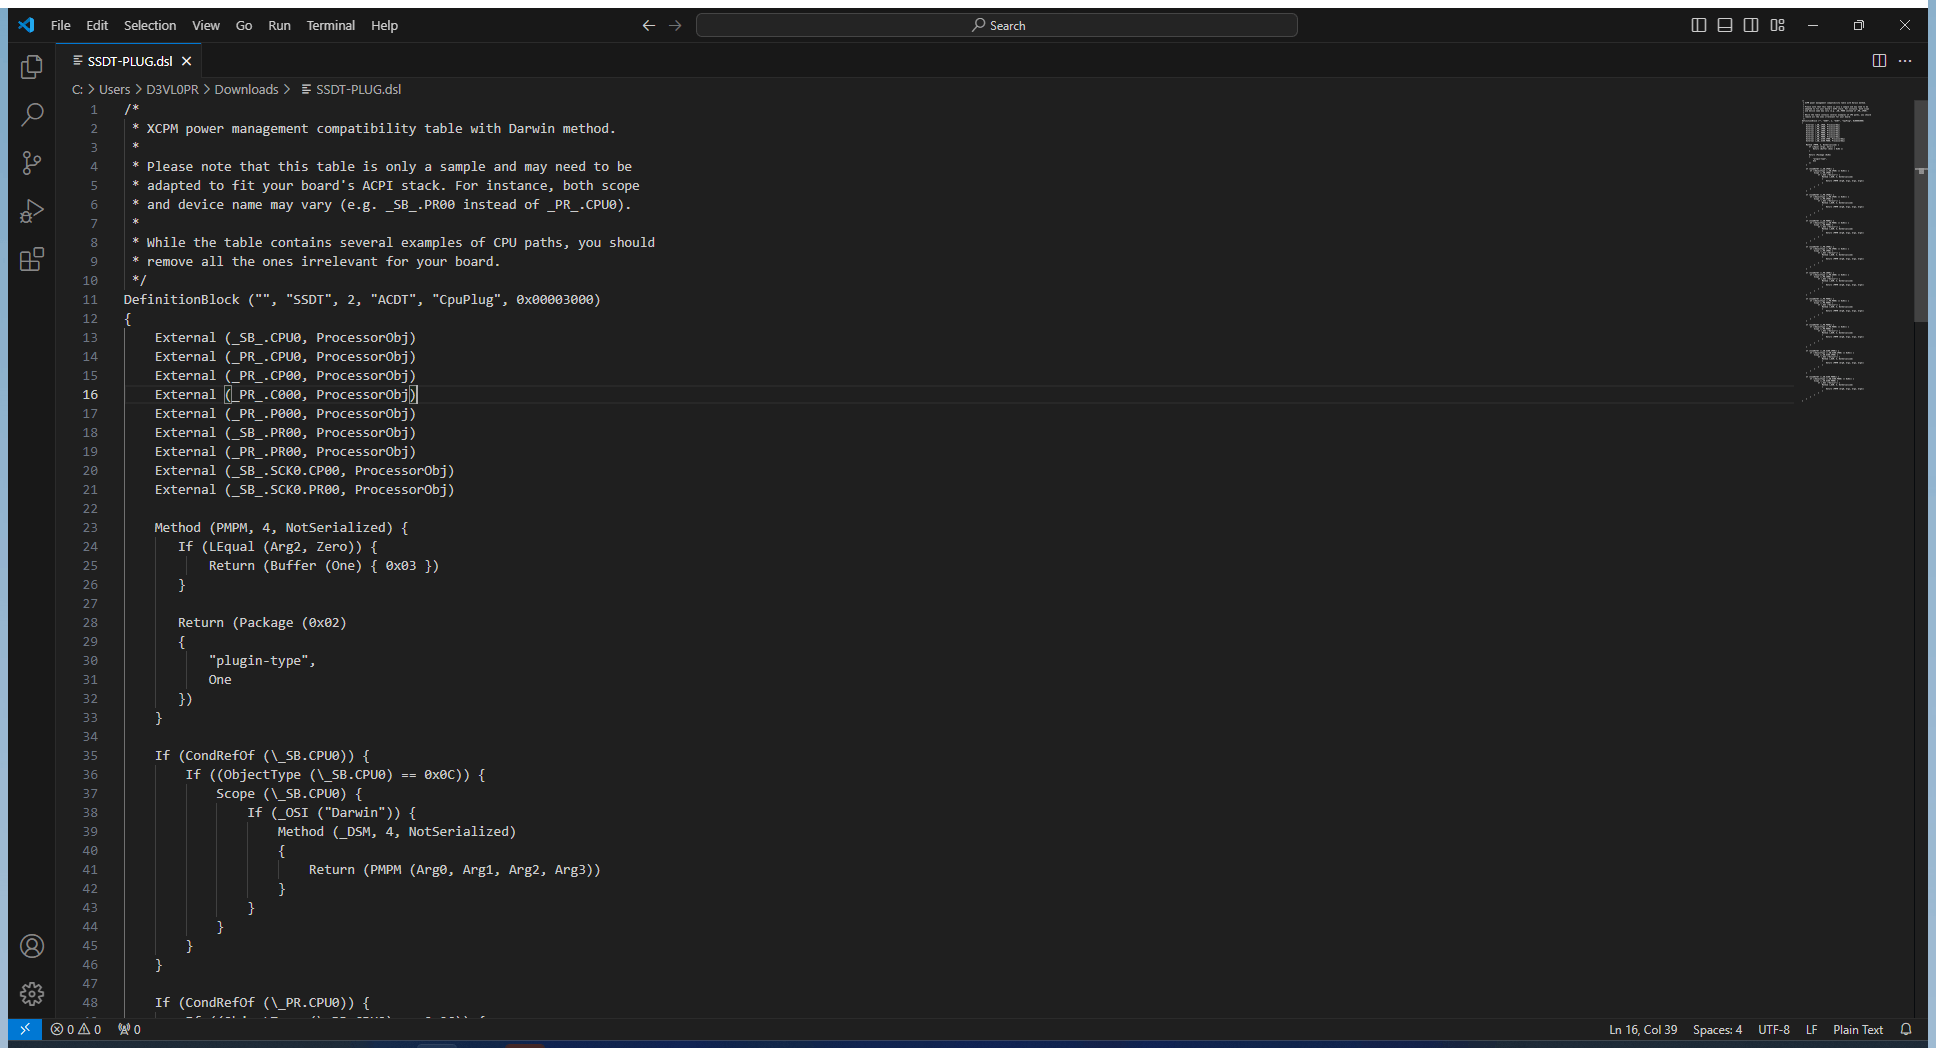
Creating SSDT-PLUG
- Download the sample SSDT-PLUG from the Opencore GitHub repo.
- Open the sample file in VS Code.

- Find for Processor, from last step,

- Now we have to remove all other processor’s entries from sample list except ours.
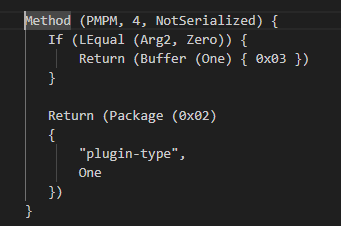
- we also have to leave this block of code, which sets plugin-type =1

- The cleaned up File should look like this.

- Now it’s time to compile our SSDT, the same process as we decompiled our DSDT mentioned Above.


SSDT-EC-USBX
SSDT-EC/USBX serves different purposes on desktops and laptops:
Desktops:
- Fixes incompatibility: The embedded controller (EC) on desktop computers is often incompatible with macOS. SSDT-EC/USBX disables the real EC and creates a fake one to bypass this issue.
- Enables power management: It also creates a fake USBX device to provide essential USB power management data for newer Intel processors (Skylake and newer), which is required for proper system functionality.
Laptops:
- Preserves essential functions: The EC on laptops is crucial for controlling features like hotkeys and battery management. SSDT-EC/USBX doesn’t disable the EC but creates a compatible “fake” EC to ensure these features work correctly in macOS. This is done because the laptop’s real EC may have a name that is incompatible with macOS.
In essence, SSDT-EC/USBX ensures compatibility between your computer’s hardware and macOS, allowing for proper power management and essential functionality.
Same as previous step, we’ll be using Windows Method here,
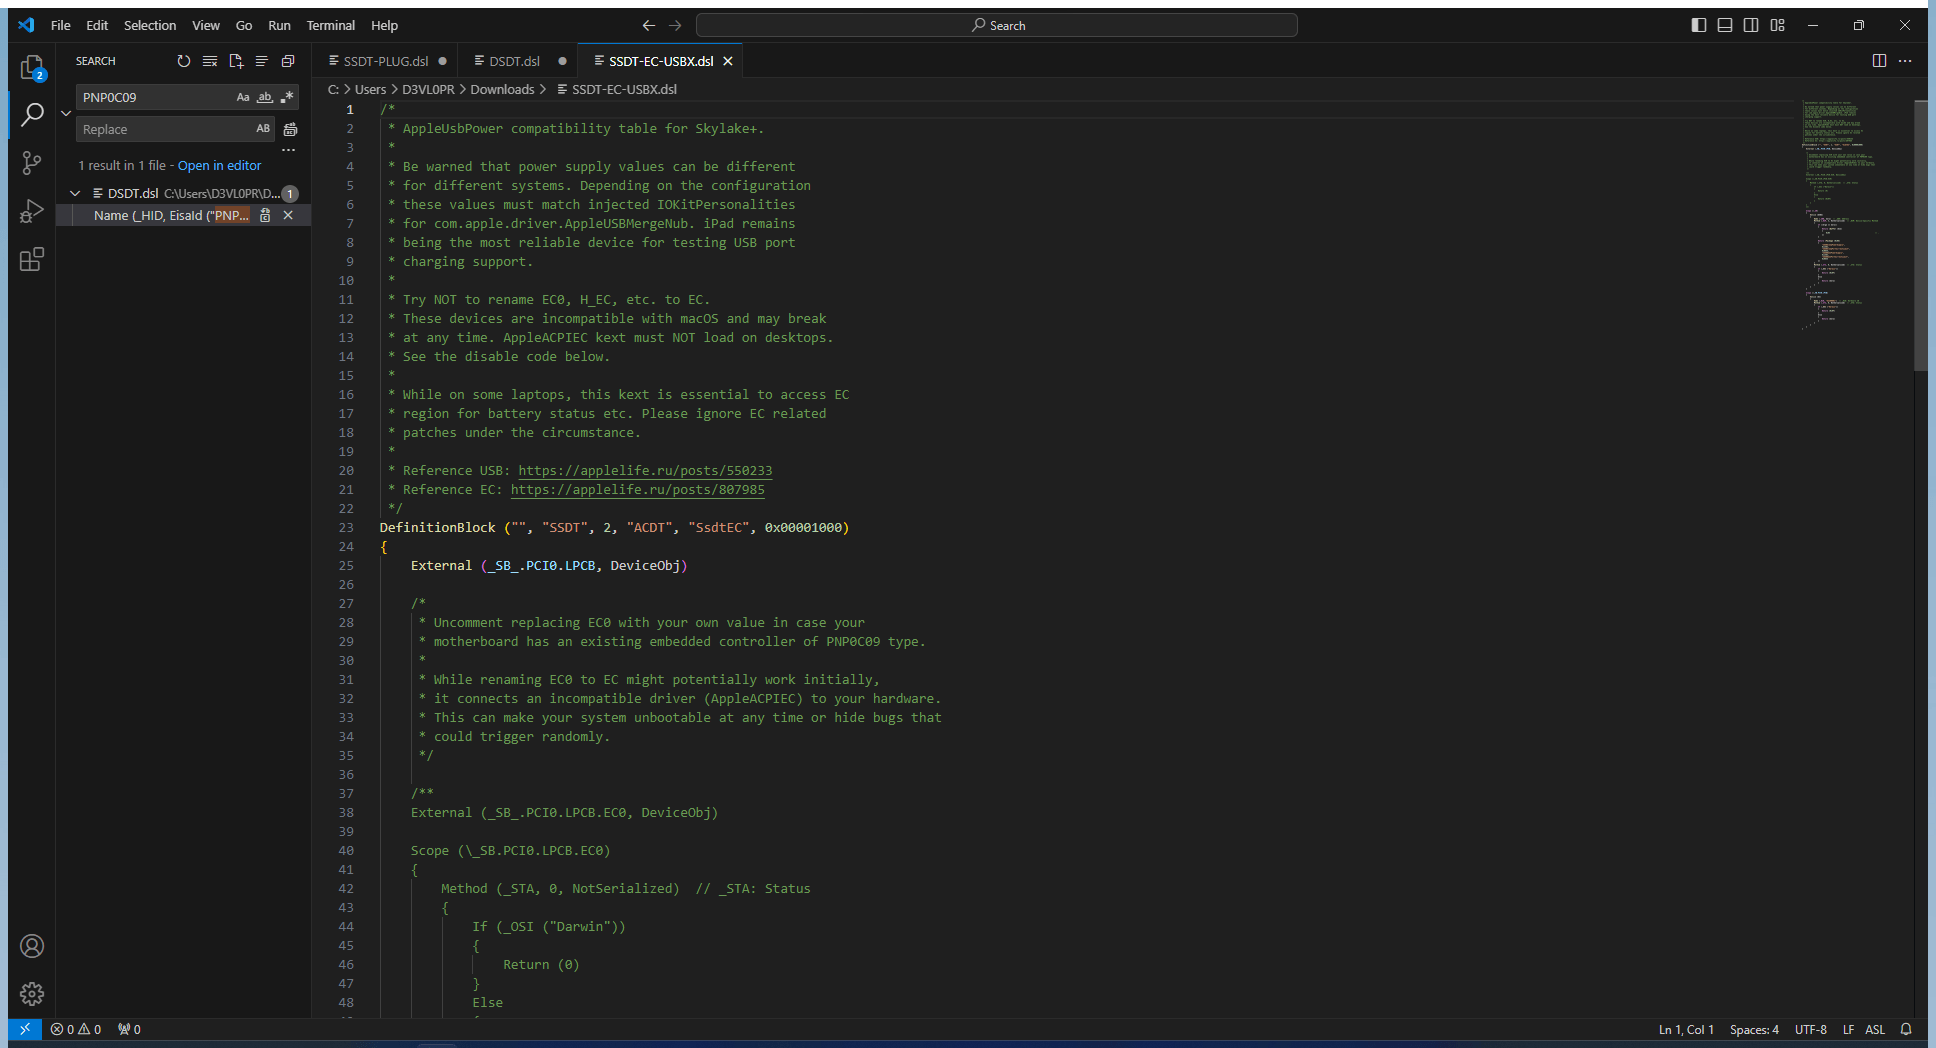
- Open the DSDT.dsl file in VS Code ans Search for
PNP0C09
here,Scopeis your Controller Path andDeviceis your device name.
for example, Ours is,
PATH = _SB.PCI0.LPCB
DEVICE NAME = H_EC - Now Download the sample SSDT-EC-USBX.dsl and open it on VS Code.

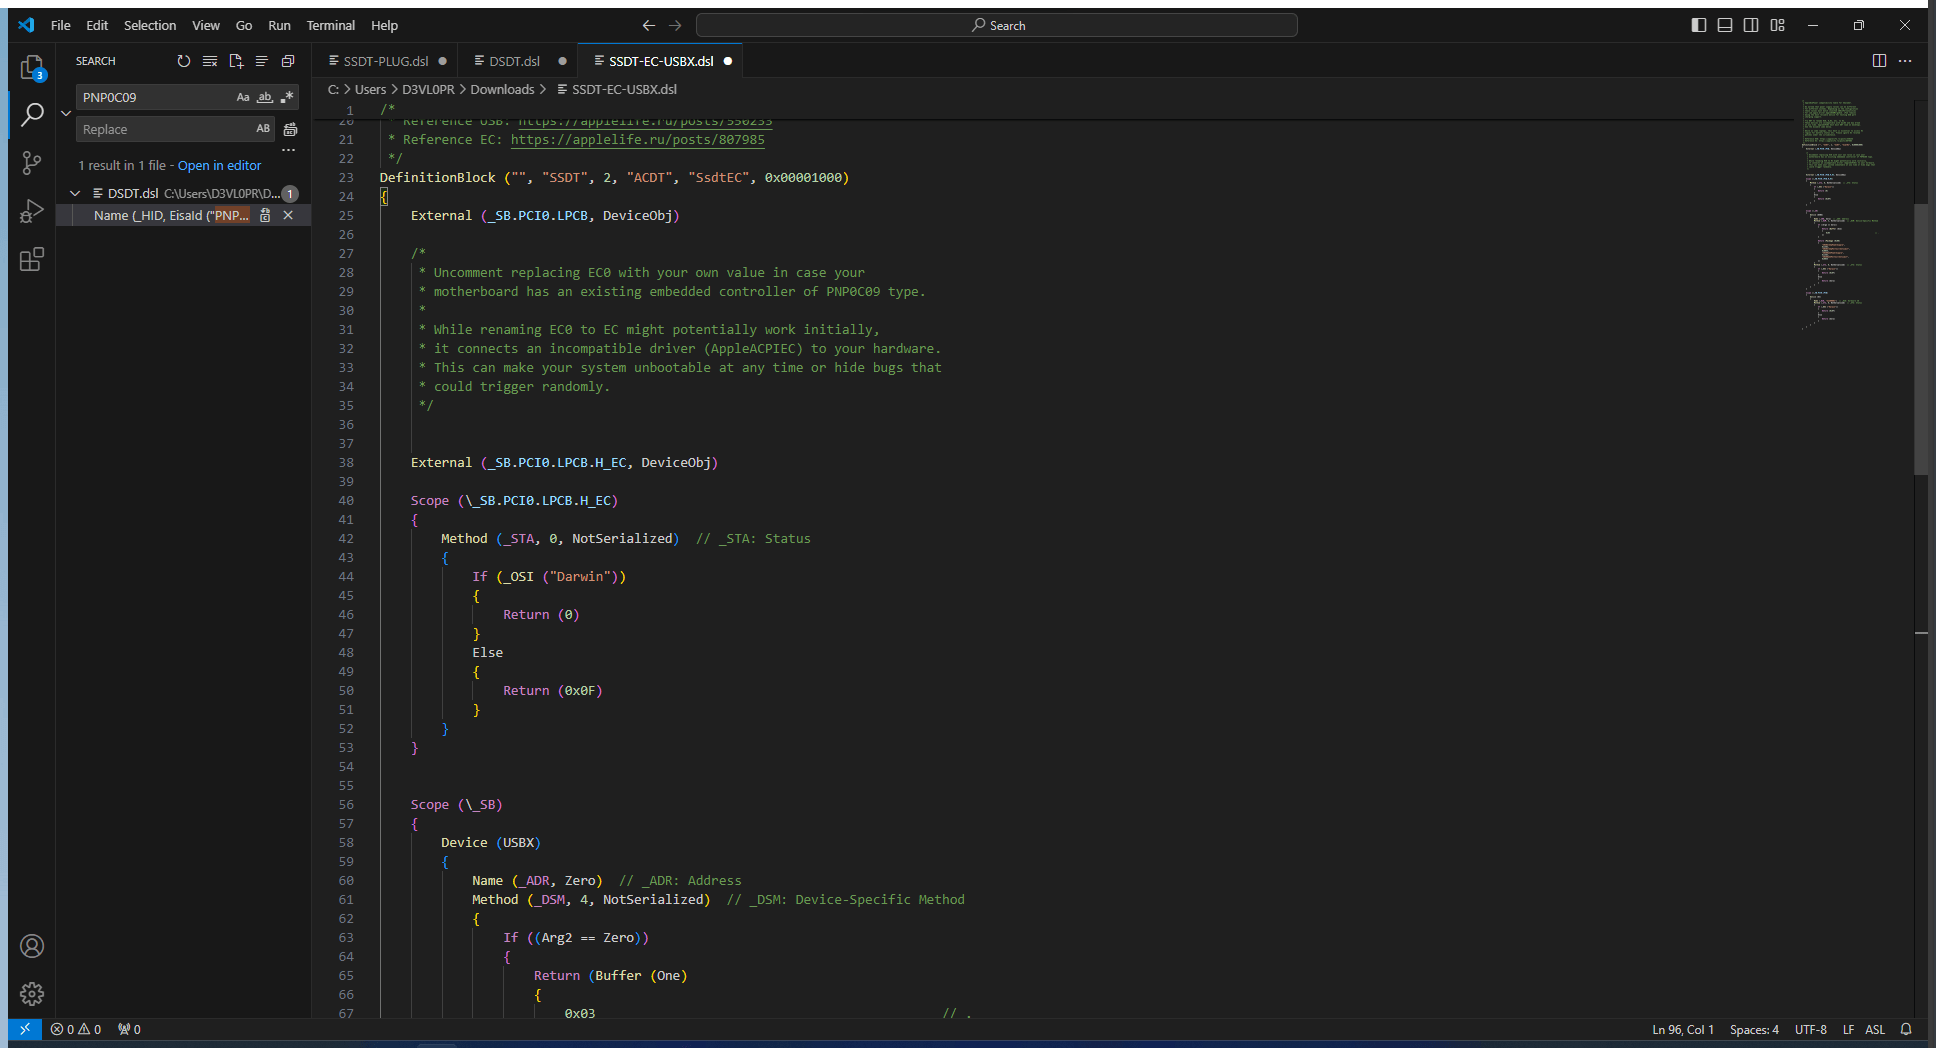
- Now lets replace the PATH and Device Name,
line 25 – changed path name to_SB.PCI0.LPCB
uncomment line 38 to 53.
Changed path and Device name on External and Scope line.
to _SB.PCI0.LPCB.H_EC , where H_EC is device name
- Save the file and compile the SSDT-EC-USBX.dsl to SSDT-EC-USBX.aml.

SSDT-AWAC
SSDT-AWAC/RTC0 is designed to address system clock issues on newer Intel chipsets (listed above) when running macOS.
What it does:
- SSDT-AWAC: Attempts to reactivate the older Real-Time Clock (RTC) on your motherboard that is natively compatible with macOS.
- SSDT-RTC0: If your hardware lacks the older RTC, this SSDT creates a virtual RTC to ensure proper system timekeeping in macOS.
Why you need it:
Newer Intel chipsets often come with a different type of RTC that isn’t fully compatible with macOS, leading to inaccurate system time and potential issues. SSDT-AWAC/RTC0 fixes this by either restoring compatibility with the older RTC or creating a functional replacement.
Now lets Get Started,
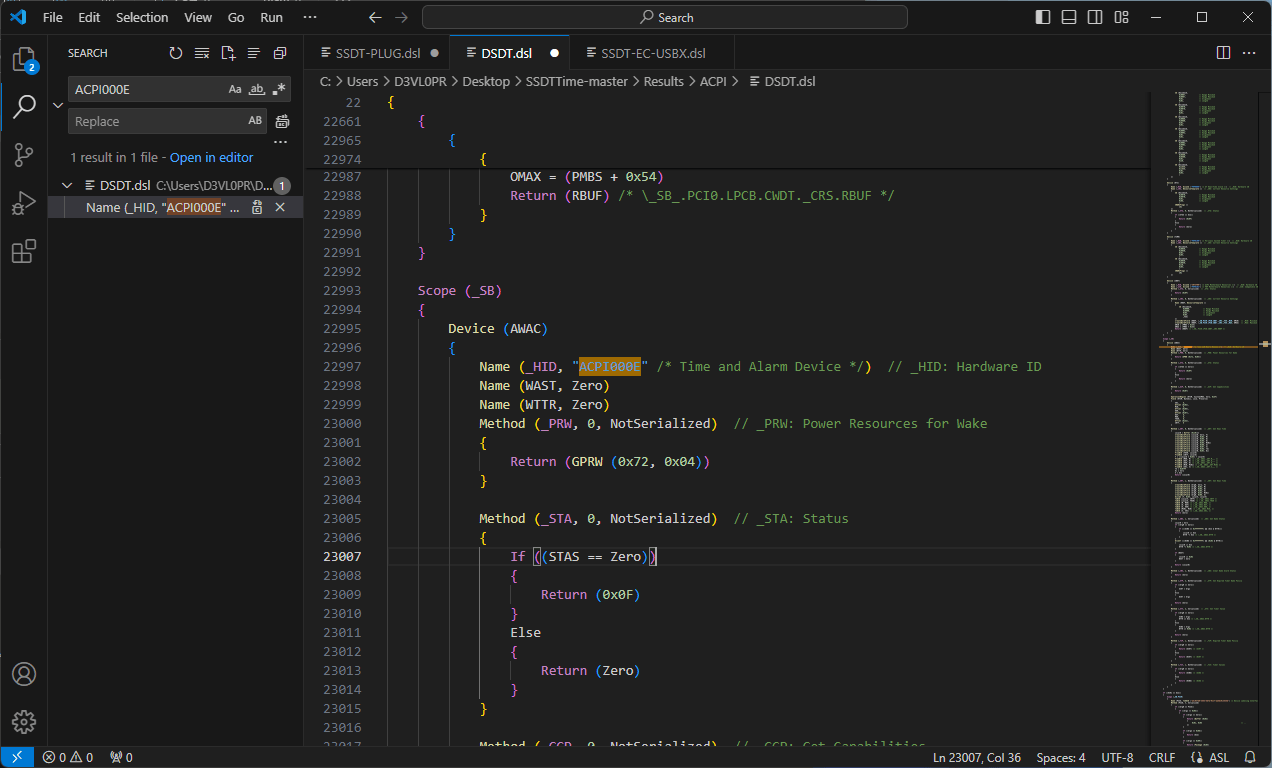
- Open DSDT.dsl in VS Code and Search for
ACPI000E
- We Found the AWAC clock which can be disabled _STA (Device Status) Zero means it wont show up, if nothing appeared after searching means we dont need to do anything for AWAC & RTC.
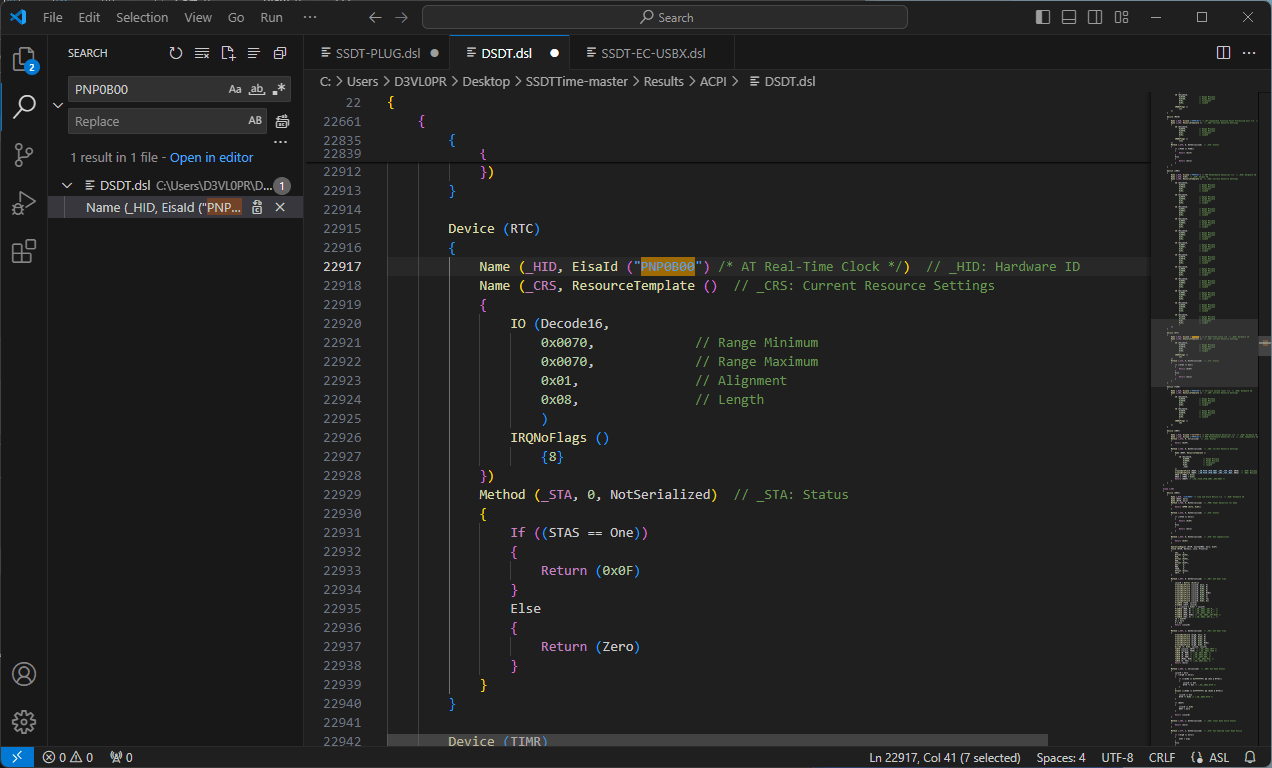
- Now Search for
PNP0B00and inspect.
We have RTC too, so we can disable our AWAC and Enable the RTC. - Now there is no more changes needed we just have to download the sample SSDT-AWAC.aml and compile it without any changes.

SSDT-PMC
This SSDT is essential for most Intel 300-series motherboards, specifically:
- B360
- B365
- H310
- H370 (except HM370 chipsets)
- Z390
What it does:
This SSDT restores Non-Volatile Random Access Memory (NVRAM) support, which is crucial for storing boot settings, system configuration, and other important data. Without it, your system may not boot properly, or you might lose settings between restarts.
Who needs it:
If you have one of the listed 300-series motherboards and you’re experiencing issues with NVRAM, such as lost settings or boot problems, this SSDT is likely the solution.
Who doesn’t need it:
- Users with 10th generation Intel motherboards don’t require this SSDT, as NVRAM is natively supported on those platforms.
- If your H370 chipset is specifically HM370, you also don’t need it.
Benefits:
- Restores NVRAM functionality: Ensures your system boots reliably and retains settings.
- Easy to use: Requires minimal configuration, making it simple for most users to implement.
Important Note: This SSDT is not needed for Z370 motherboards, as they have different NVRAM requirements.
let’s get started with finding acpi path for it,
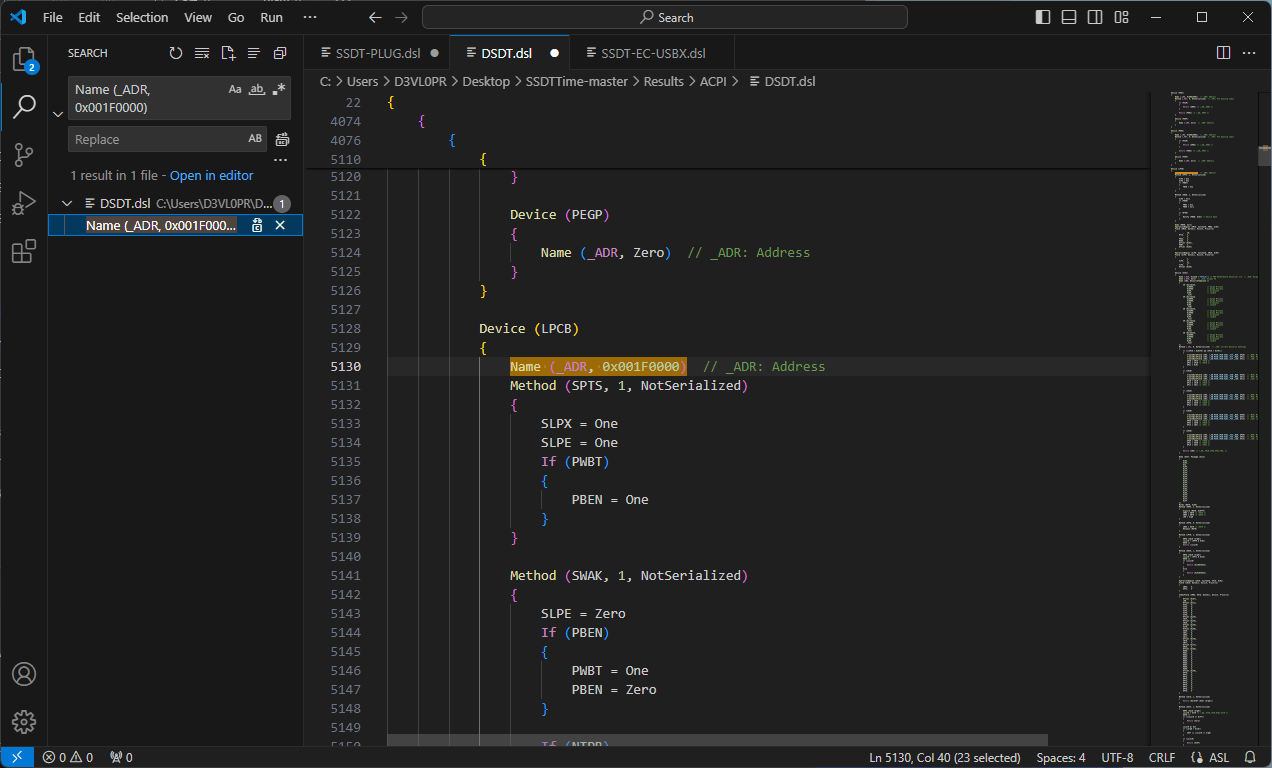
- Find the LPC (LowPinCount) path, search for
Name (_ADR, 0x001F0000)
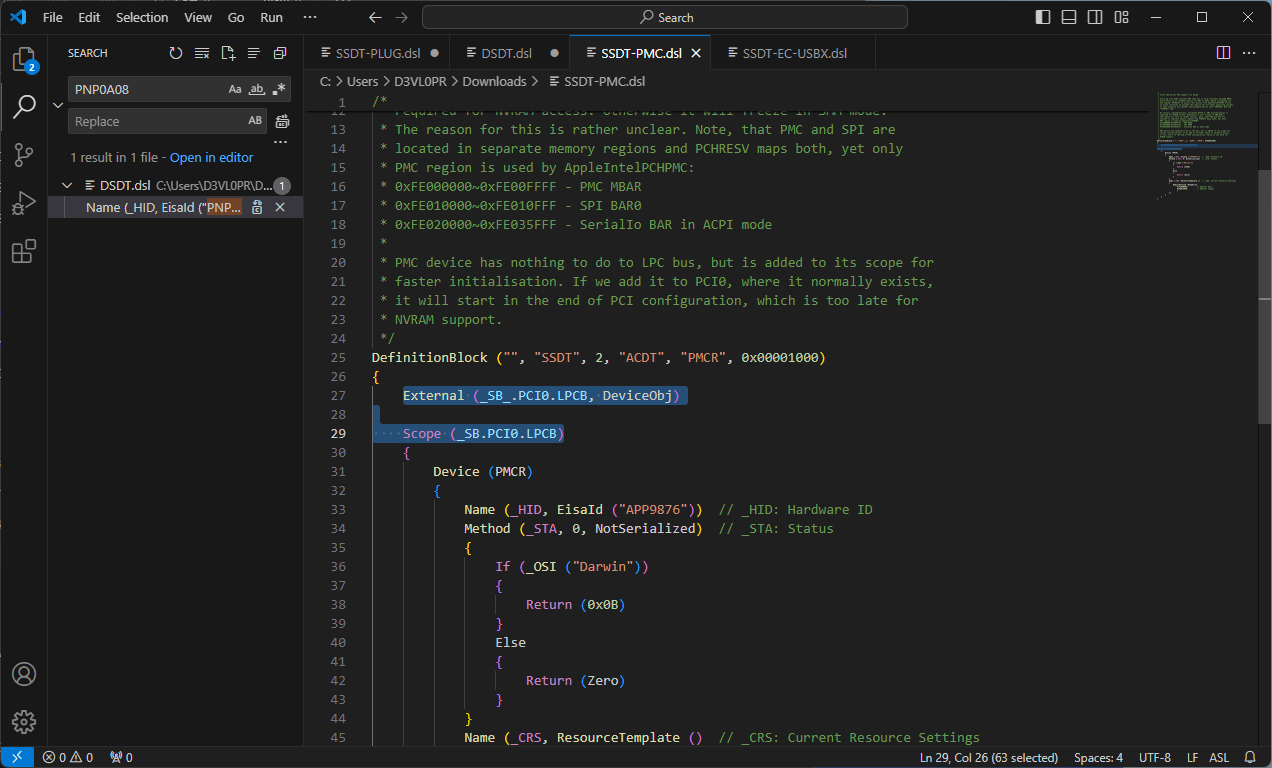
- Now find the PCI Path, Search for
PNP0A08
- Now, we have our LPC & PCI path, that is PCI0.LPCB, we dont have to change anything to the sample SSDT but if you get any other path or name you have to change.

- Now we have to compile to .AML file like all .DSL file we compiled in previous steps.

Now we have All 4 Files for our Opencore ACPI folder, Next Part is to Configure OpenCore.


