The End of an Era, The Beginning of Perfection
Welcome to 2026. If you are reading this, you know the score: macOS Tahoe (version 26) is the last version of macOS to support Intel processors. The version that follows it will be exclusively for Apple Silicon, making it practically impossible to run on our custom-built PCs.
UPDATED: 2 JULY 2026/ TAHOE DEVELOPER BETA 2
This is not a sad story. It’s an opportunity.
For nearly two decades, we chased a moving target. With every new macOS release came new challenges, broken kexts, and the thrill of the upgrade. That race is now over. Our new goal is not to keep up, but to perfect a final, definitive, and feature-complete version of macOS on our own hardware.
This guide will walk you through creating a “Long-Term Support” (LTS) Hackintosh. A machine built with perfectly compatible parts, configured for maximum stability, and designed to serve you reliably for years to come.
Part 1: The Philosophy & Hardware for a Final Build
Your hardware choices are now more critical than ever. The aim is not for the absolute newest components, but for the most compatible and best-supported ones to ensure a rock-solid system.
CPU: The Heart of the Matter
- The Sweet Spot (Intel): 10th-Generation Intel Core “Comet Lake” processors (i5-10600K, i7-10700K, i9-10900K). These processors are the foundation of the last generation of Intel iMacs (iMac20,1 and iMac20,2) and are natively supported by macOS Tahoe. They represent the peak of hassle-free compatibility.
- The Enthusiast’s Choice (Intel): 12th, 13th, and 14th-Gen Intel CPUs (“Alder Lake” and “Raptor Lake”) are viable but require more complex setup, including patches to manage their Performance and Efficiency cores. While powerful, they may require ongoing community support for full stability. Intel’s newest “Arrow Lake” CPUs are still bleeding-edge and should be avoided for a stable build.
- The AMD Path: AMD Ryzen 7000 and 9000 series CPUs are incredibly powerful and have a strong community following. However, they will always require significant kernel patching to run macOS. This path is for experienced tinkerers who are comfortable with potential quirks. For an LTS build, Intel is the more straightforward choice.
Motherboard: The Foundation
- For the Sweet Spot (Intel): A high-quality Z490 or Z590 motherboard is the gold standard. Brands like Gigabyte (Designare, Aorus) and ASUS (ProArt, ROG Strix) are well-documented and offer the stability needed for a final build.
- For the Enthusiast’s Choice (Intel): Z690 and Z790 motherboards are necessary for newer CPUs. Ensure the board has a compatible Intel I225-V or I226-V Ethernet controller.
- For the AMD Path: B650E or X870E motherboards are excellent choices, offering the latest connectivity like USB4.
- Key Feature – Wi-Fi: No motherboard’s built-in Wi-Fi/Bluetooth will work out of the box. You must either disable it and use a PCIe card or replace the onboard M.2 module with a compatible Broadcom one. Fenvi cards (like the T919) are plug-and-play favorites.
GPU: The Only Choice is AMD
This is non-negotiable. NVIDIA GPUs have had no support for years, and Intel’s integrated graphics have limited use.
- Best Bet: AMD Radeon RX 6000 Series (6600 XT, 6800 XT, 6900 XT). These cards are natively supported in macOS Tahoe, offering excellent performance and stability without any extra configuration.
- wNewer, But Unsupported The AMD Radeon RX 7000 series is not supported, the RX 6000 series is your best bet.
Storage & Memory
- Storage: A quality NVMe M.2 SSD from a reputable brand (Crucial, WD Black). Note: Some Samsung SSD’s are not bootable so not recommended but you can try your luck.
- Memory: 32GB of DDR4 or DDR5 RAM (depending on your platform) at a reasonable speed (e.g., 3200MHz for DDR4) is the sweet spot for performance and stability.
Build I’m using:
Processor: i5 9400F (9th Gen) (iMac 19,1 till Sequoia and iMac20,1 in Tahoe)
MotherBoard: MSI B365M-PRO-VDH
GPU: AMD 5700XT
Network: BRCM943602BAED & Realtek RTL8111H Gigabit LAN controller
Audio: Realtek® ALC892 Codec
RAM: Corsair 8Gx4 2400Mhz Ram.
Storage: Samsung 980 Evo Pro
Tahoe Supported Devices:
iMac20,1 27" (2020, Comet Lake)
iMac20,2 27" w/ 5700/XT (2020, Comet Lake)
MacBookPro16,1 16" (2019, Coffee Lake Refresh)
MacBookPro16,2 13" w/ 4 TB ports (2020, Ice Lake)
MacBookPro16,4 16" w/ 5600M (2019, Coffee Lake Refresh)
MacPro7,1 (2019, Cascade Lake)
Not Supported In Tahoe:
iMac19,1 27" (2019, Coffee Lake [+ Refresh]) i5/i3 are 8th gen, i7/i9 is 9th gen
iMac19,2 21.5" (2019, Coffee Lake)
iMacPro1,1 w/ Vega (Late 2017, Skylake W)
MacBookAir9,1 (2020, Ice Lake)
Macmini8,1 (Late 2018, Coffee Lake)
MacBookPro15,1 15" (2018 + 2019, Coffee Lake [+ Refresh])
MacBookPro15,2 13" (2018 + 2019, Coffee Lake)
MacBookPro15,3 15" w/ Vega (2018 + 2019, Coffee Lake [+ Refresh])
MacBookPro15,4 13" w/ 2 TB Ports (2019, Coffee Lake)
MacBookPro16,3 13" w/ 2 TB ports (2020, Coffee Lake)
Part 2: The Build Process – OpenCore in 2026
This guide assumes you are using OpenCore, the only bootloader you should be considering. We will be using version 1.0.5 (latest commit) or newer.
Step 1: Create Your macOS Tahoe Installer
- Download latest commit of Opencore Bootloader from here.
- On a working Mac, Hackintosh, Windows or Linux download macOS Tahoe 26.0 from gibmacOS or Direct Download.
- Plug in a 16GB or larger USB drive.
- Follow this Guide: https://kextcache.com/guide-to-create-a-bootable-macos-usb-drive-using-gibmacos-tool/
- This will create a bootable installer. Now, we’ll add OpenCore.
Step 2: Gather Your Files (Kexts & SSDTs)
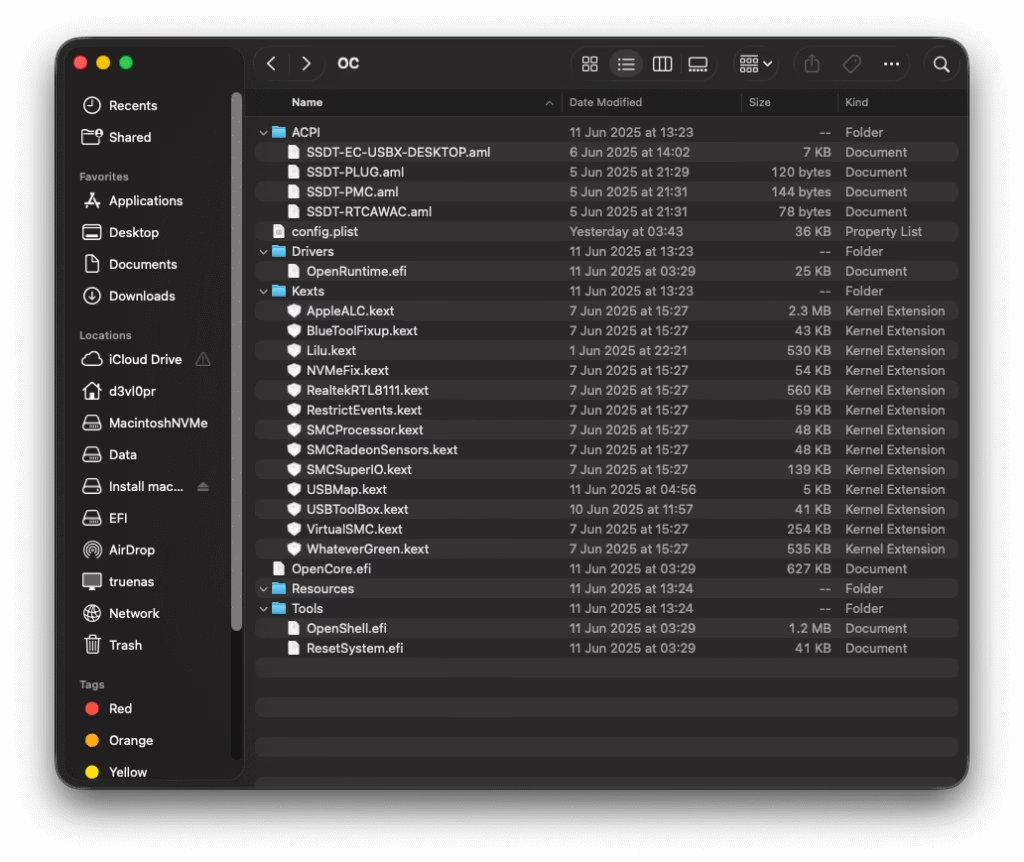
Create a folder on your desktop. This is where you will build your EFI. You will need:
- OpenCore: The latest commit from here.
- Kexts (Kernel Extensions): These are the drivers for your hardware.
- Essentials:
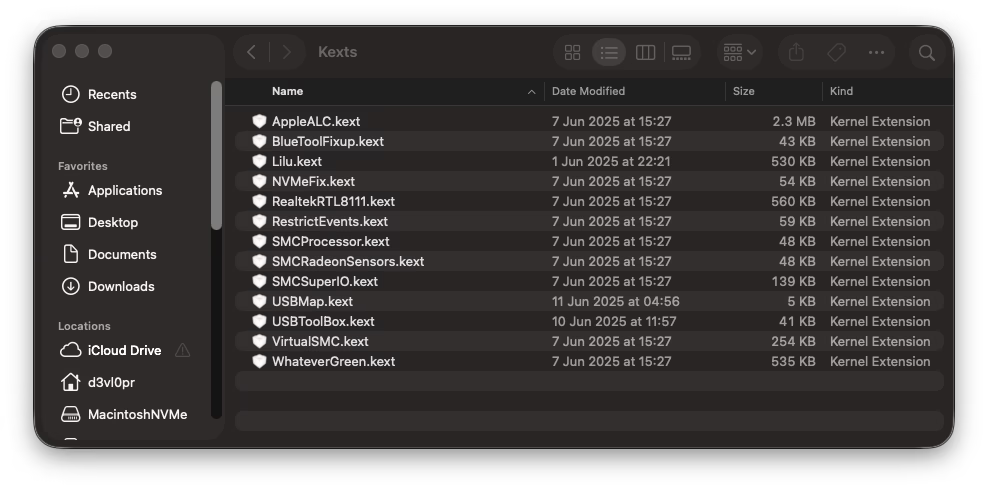
Lilu.kext: A patcher required for most other kexts. (Essential) (latest Commit)VirtualSMC.kext: Emulates the System Management Controller. (Essential) (latest Commit)WhateverGreen.kext: For graphics card support. (Essential) (latest Commit)AppleALC.kext: For onboard audio. (Essential) (latest Release)RestrictEvents.kext: Helps with CPU naming and other system events. (Recommended)- Networking Kext:
LucyRTL8125Ethernet.kextfor Realtek 2.5GbE orRealtekRTL8111.kextfor Realtek Gigabit orIntelMausi.kextfor Intel NICs.
- SSDTs (ACPI Tables): These help macOS understand your motherboard’s hardware. Use the pre-built SSDTs from Dortania for your CPU generation (e.g., Comet Lake).
SSDT-PLUG-ALT.aml: For CPU power management.SSDT-EC-USBX.aml: Fixes the embedded controller and USB power.SSDT-AWAC.aml: For motherboards with an AWAC clock. (only for machines with ACPI0007)SSDT-RHUB.aml: To fix USB port issues on some boards. (not essential)

Configuration Tool: ProperTree for editing the config.plist.
2.2. Building the EFI Folder
- Format a 16GB+ USB drive as Mac OS Extended (Journaled).
- Create the macOS installer on the USB using the
createinstallmediacommand in Terminal. - Mount the EFI partition of the USB drive.
- Create an
EFIfolder on this partition. - Inside
EFI, createBOOTandOCfolders. - Populate
OCwith the files from the OpenCore package and your gathered kexts, SSDTs, and drivers.

Part 3: The config.plist – Your System’s Blueprint for Installation
This is the most detailed part of the process. Your config.plist tells OpenCore exactly how to patch macOS for your specific hardware.
- Use the OpenCore Install Guide: The official Dortania guide will still be the definitive source. The guide is continuously updated. Advise your readers to follow it meticulously for their specific platform (e.g., “Intel Alder Lake/Raptor Lake”).
- Place your collected kexts in
EFI/OC/Kextsand your SSDTs inEFI/OC/ACPI. - Open your
config.plist(EFI/OC/config.plist) with a plist editor like ProperTree. and use OCCleanSnapshot form menu. - Key Sections to Configure:
- ACPI: Add your SSDT files.
- Kernel: Add your kexts in the correct order. Apply necessary patches for AMD CPUs or Intel E-Cores.
- DeviceProperties: This is where you will define your iGPU and audio layout ID.
- NVRAM: Make sure to add
-lilubetaallto your boot arguments. - PlatformInfo: Use genSMBIOS to Generate new supported SMBIOS for your setup or use -no_combat_check boot arg.
- UEFI: Add necessary drivers like
HfsPlus.efiandOpenRuntime.efi.
- Make sure to Disable the
WhateverGreen.kextandUSBMap.kext/UTBMap.kextin your config.plist using ProperTree as USB Maps are not yet fully supported in Tahoe.
Step 4: BIOS Settings
Reboot your PC and enter the BIOS. The key settings are:
- Disable: Fast Boot, Secure Boot, CSM (Compatibility Support Module), Intel SGX, CFG Lock.
- Enable: Above 4G Decoding, Re-Size BAR Support, XHCI Hand-off.
Step 5: Install macOS Tahoe
- Boot from your USB drive.
- In the OpenCore boot picker, select “Install macOS Tahoe.”
- Use Disk Utility to erase your target SSD as APFS with a GUID Partition Map.
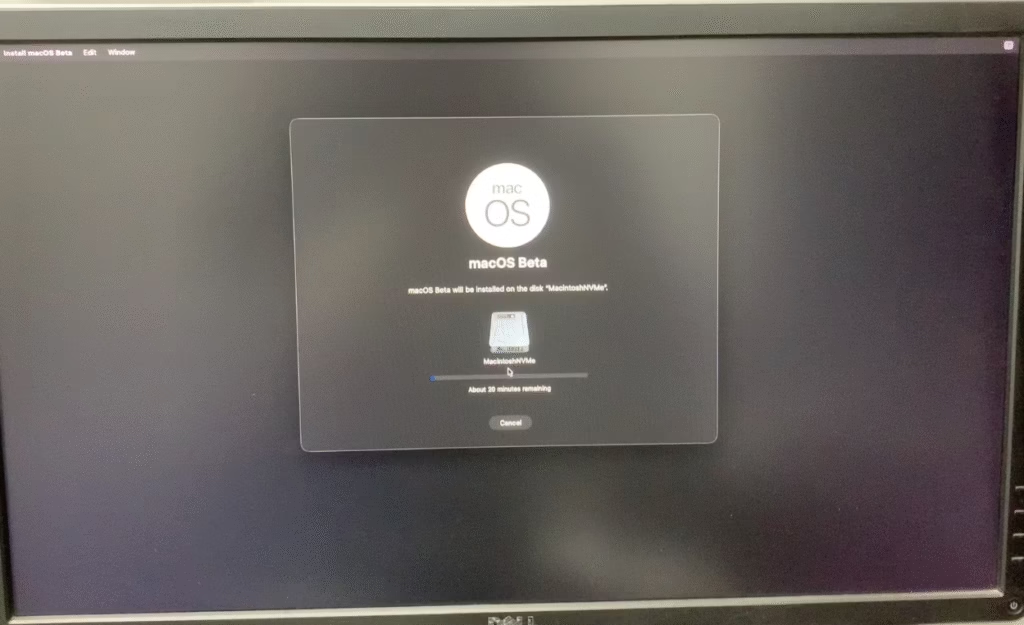
- Proceed with the installation. The system will reboot several times. Each time, choose your new macOS installation from the boot picker (it might be named “macOS Installer” initially).


Part 3: Post-Installation – Perfecting Your Sunset Build
You’ve booted into the desktop, but you’re not done. This is the part that turns a project into a daily driver.
- Mount EFI: Use a tool like MountEFI to mount the EFI partition of your main SSD. Copy your working EFI folder from the USB drive to the SSD’s EFI partition. You can now boot without the USB.
- Enable WhateverGreen.kext is you are using AMD Hardware i.e 5xxx, 6xxx or 7xxx Series.
- USB Mapping: macOS has a 15-port limit. Your motherboard has more. You must map your USB ports to disable unused ones and correctly classify the active ones (USB2, USB3, Type-C). Use the USBToolBox kext and its Windows utility for the easiest mapping experience. A proper USB map is the key to long-term stability and sleep/wake functionality.
- Verify Functionality: Check that everything works:
- Graphics: Go to
About This Mac. Does it show your AMD GPU correctly? - Audio: Can you select your outputs and inputs in System Settings?
- Networking: Is Ethernet working?
- iServices: Test iMessage and FaceTime. If they don’t work, regenerate your SMBIOS values in the
config.plist.
- Graphics: Go to
- Create a Final Backup: Once your system is 100% stable, with all hardware working and USB ports mapped, make a full, bootable clone of your system using a tool like Carbon Copy Cloner. Store this backup safely. If anything ever goes wrong, you can restore your perfect installation in minutes.
Answers from r/Hackintosh Discord: Thanks to Developers.
AMD Polaris GPUs do not work.
wait for the WhateverGreen.kext update.
waiting for DSMOS?
Use the updated OC build; otherwise, you will see an injection error with VirtualSMC in the logs.
AMDSupport panic in in Opencore Boot?
disable WhateverGreen.kext via config.plist
IntelBTPatcher panic in Opencore Boot?
disable it and other Bluetooth kexts.
AppleEthernetRL panic in Opencore Boot?
Apple now ships a RTL8125 kext, it causes issues for some users.
Stuck on prohibited sign with Garbled Screen?
Disable USBMap.kext or UTBMap.kext
Intel GbE cards that use IntelMausi drivers.
In your OC Config, enable Kernel > Quirks > DisableIoMapper (possibly also DisableIoMapperMapping, but the prior alone worked for me)
For those with issues with I2C/PS2 in Tahoe.
1. Download DebugEnhancer and add it to OC,
2. add msgbuf=1048576 -lilubetaall to your boot-args,
3. once booted to the desktop, run sudo dmesg | grep -iE 'i2c|gpio|ps2' > ~/Desktop/i2c_log.txt,
then share the log file in the comments
Conclusion: Enjoy the View
Congratulations. You have built the ultimate expression of a Hackintosh—a stable, powerful machine running the final and most refined version of Intel-compatible macOS. This computer is a testament to the community’s passion and ingenuity.
There are no more major OS versions to chase. There is no more update anxiety. You are free to simply use and enjoy your perfect Mac. Use it for work, for creativity, for everything you intended. And when the day comes that you finally move on, you will have a perfect time capsule of the incredible era of Hackintoshing.
Welcome to the sunset. It’s beautiful from here.
My EFI for Research Purposes: Download


