Installing Hackintosh was never been easier If you want Everything to be Buttery Cream wait till 10.15.2 Version of macOS. Installing the newest version means Living On the Edge because as time passes new workarounds come maybe the problem or error you are facing still doesn’t have a workaround. Don’t mess around if you don’t know what you are doing else it may break your setup and this guide is applicable to Sierra/High Sierra/ Mojave and Catalina.
Following are the Workarounds for the problems,
1. EC Configurations:
Make Sure the EC Device is Configured Correctly, This Issue Arises with macOS Catalina.
Note: Don’t Skip this step as it may brick your system and you will see a blank screen after booting up!
Summary:

So the thing is, Starting with macOS Beta 5 a plugin named AppleACPIEC.kext depends on the ACPI device named ‘ EC‘ but most of the PC manufacturers don’t name their embedded controller ‘ EC‘ Instead, they use the name EC0, H_ECor ECDVand because of this mess, AppleACPIEC.kext cant find the actual EC Device and the boot will be stuck something like,
as apfs_module_start...,
Waiting for Root device,
Waiting on...IOResources...,
previous shutdown cause...,
there are many other errors that are harder to debug because the plugin itself is a part of AppleACPIPlatform.kext.
so the best practice is to either block this kext (Desktop Only-as it doesn’t have any use on desktop), make Fake EC Device (Preferred For Desktop) or to Rename the EC Device (Laptop).
1.1 Block The AppleACPIEC.kext (Recommended for OpenCore Desktop Users Only)
Currently, The Kext Blocker is not working of OC bootloader, I’ll Update this Section as soon as the bug gets fixed.
Project Repository: Here
Bug Tracker: Here
1.2 Fake EC Implementation. (Recommended For Desktop Users)
Make Sure You have ACPI Files Dumped and have DSDT.aml handy of your PC, Refer to 1.3 if you want to know how to dump ACPI from Clover.
Check if you have EC Device, from DSDT.aml

If The Method Returns Zero, it means you do not have an active Device.
Tools Needed:
IORegistryExplorer
Terminal Of course.
Git. Internet
Step 1: Go to the CorpNewt’s Repo, Give a Star and Clone SSDTTime.

Step 2: Unzip the folder and browse through the SSDTTime.command

Step 3: ( If you Got this Error, Follow Along else Skip to Step )

Step 4: Open Terminal and type the command,
chmod u+x/path to the command file.
In my case,

Step 5: Now Browse through the File and Double Click on the Command Statement.

Step 6: Type 2 and press Enter. for Fake EC Patch.

Step 6: Drag and Drop the DSDT.aml From your Origin Folder of Clover ACPI DUMP.
Step 7: It’ll Search for your Device and Make a Patch for you. Thanks to Corpnewt for Easy Implementation.
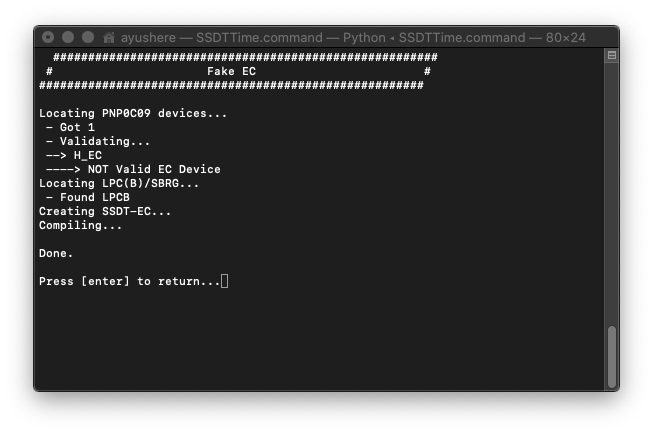
Step 8: After Compiling It’ll Open the Result in Finder.
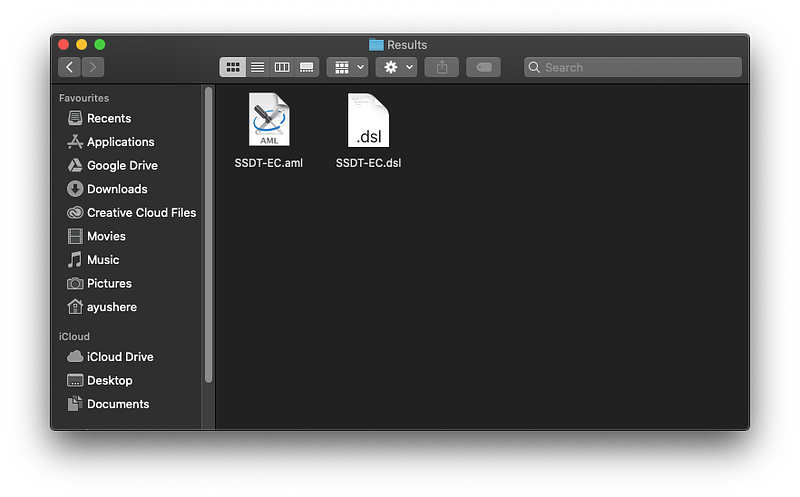
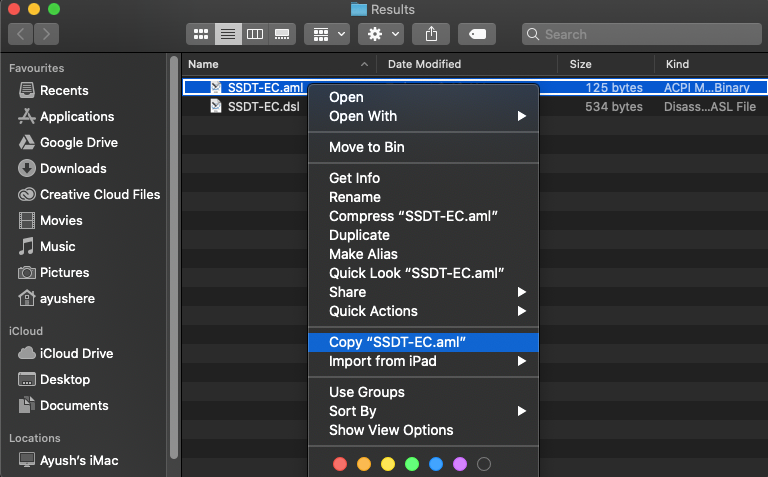
Step 9: Copy the SSDT-EC.aml to EFI/Clover/ACPI/Patched
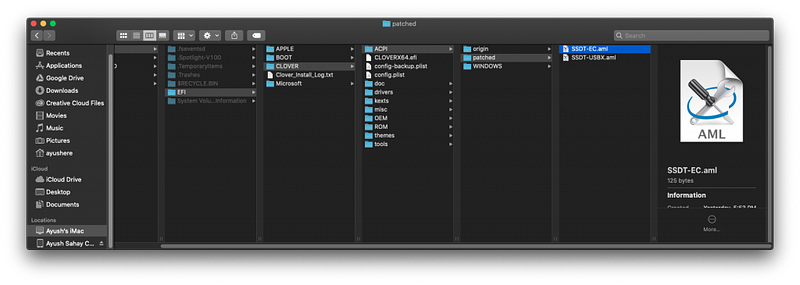
Step 10: Now Reboot and Check, in IORegistryExplorer.app. if the EC Device is Shown you have Successfully Implemented The Patch.

If the Device EC Doesn’t Show up you probably missed at some point. go through all the steps again.
1.3 To Rename EC Device: (Recommended For Laptop users Only)
First, we have to find what our EC Device is Actually called? EC0, H_ECor ECDV
Tools Needed:
Terminal Of course.
Step 1. Download and Install Xcode from the Apple Website or App Store.
Step 2.Download or clone MaciASL from Acidanthara Github.

Step 3. Open the MaciASL Source from Xcode by Double Clicking the MaciASL.xcodeproj

Step 4. Click the Play (Run) button from the upper Left Corner.

Step 5: Dump your ACPI files from Clover Bootloader by clicking F4 on the Boot Selection Screen.
Step 6: Mount your EFI Partition and browse through EFI/CLOVER/ACPI/origin and open DSDT.aml with MaciASL you just compiled.
Step 7: Press Command+F and Search for Device PNP0C09
Step 8: You Got your Device Name, In this case, its “H_EC”.
if you got two devices in search you have to check which is the main one? make sure it should have these properties like _HID, _CRS and _GPE Now its time to Apply the Patch as we have our EC name.
Step 1: Download Hackintool and Go to Bootloader Tab. (It Probably change the EC to EC__) Found in Hex Values.
Step 2: Go on Patch> Apply Current Patches from the menu bar.

Step 3: Find your Patch in DSDT rename in my case it’s H_EC to EC.

Step 4: Select The Patch and Apply The Patch!

Step 5: Go to File > Export > Bootloader Config.plist.

Done! Now it’s Good to Go.
2.USB Power Injection
So you Just Installed Catalina and your USB Devices, Camera, Bluetooth Doesn’t work now but it is recognized? and give you a Prompt for High Power?
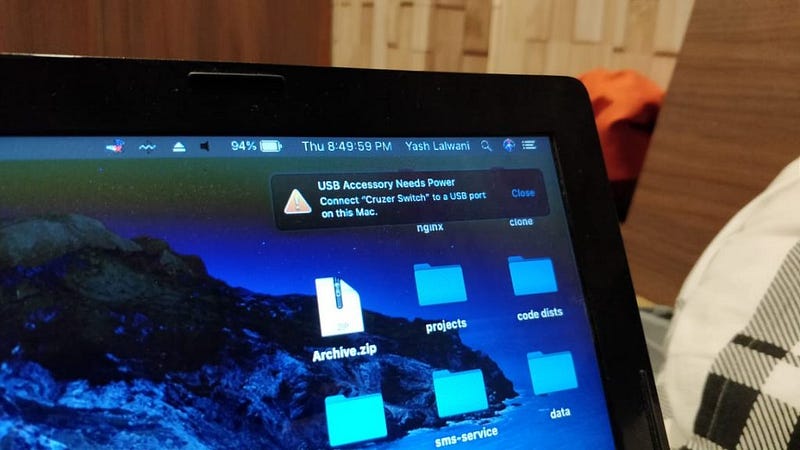
It means you were not Aware that Starting from macOS Sierra Apple Started using ‘AppleBusPowerControllerUSB’ not ‘AppleBusPowerController’ and due to this, the kext who is responsible for USB injection (USBInjectAll.kext) cant Configure the USB Devices Properly. This Also leads to the Problem when you Connect any iDevice like iPhone or iPad it’ll show ‘Not Charging’ Prompt or Inadequate Power Prompt.
So we need the Patch for our USB, and before Continuing makes Sure Your System Recognize the EC Device as it is Responsible for USB Power too. Refer to Top of this Post to know how you can Implement and Check for the USB Device. Then Follow the Steps Below after Successful EC Implementation,
Step 1: Go to Corpnewt’s Github and give a Star Then Download/Clone the Repo.
Step 2: Open the USBMap.command
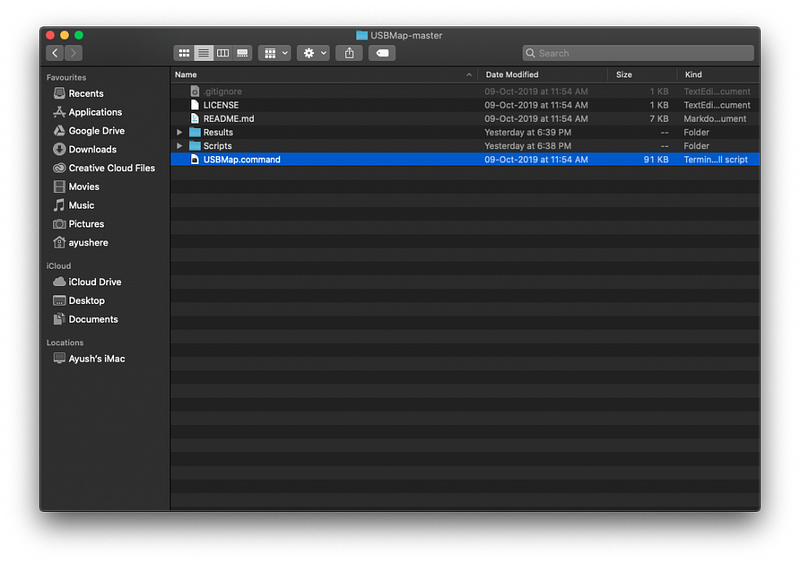
Step 3: If you have Permission Error Refer to Top of The Guide where Fake EC is Implemented.
Step 4: Type ‘U’ and Press Enter.

Step 5: If the EC Implementation is Unsuccessful it’ll Show False. So Go through the Guide Again and check for missed steps. else Press Y to Automatically Place the SSDT USB Patch into EFI/CLOVER/ACPI/Patched
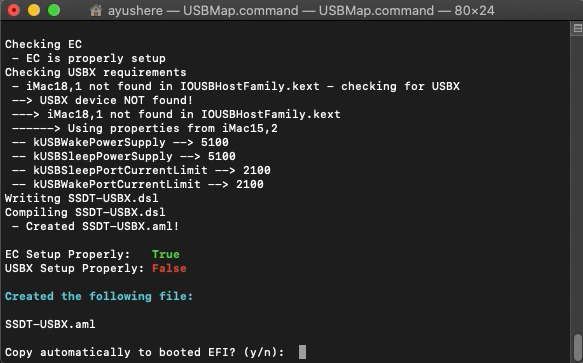
Step 6: Press Enter.
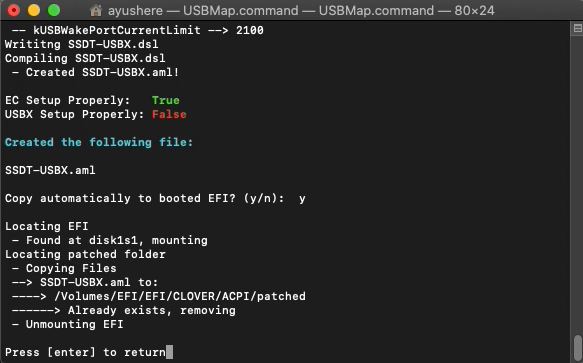
Step 7: Reboot and Check for the Devices, and if you have iPad and iPhone Connect them if it is Charging? Then Go to
Apple Menu > About My Mac > System report > USB > iPad/iPhone
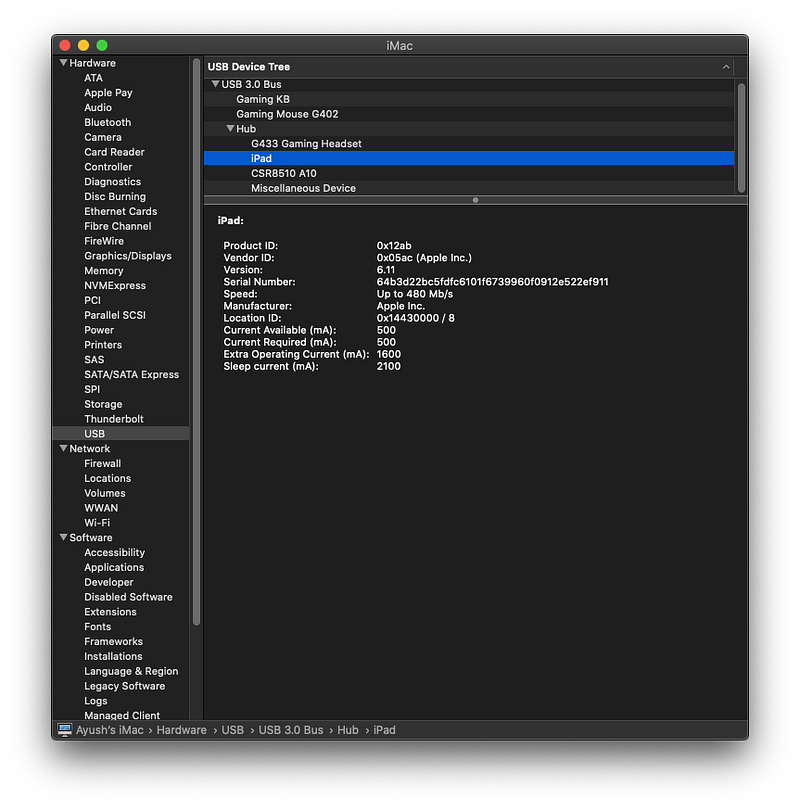
make Sure You Have These 4 Info’s Showing Up!

Done! USB Power is now Configured.
Note: You may also Configure this in SSDT-UIAC instead of Creating New SSDT.
3. Updated Everything and now you Cant write to L/E or S/L/E,
Starting with macOS Catalina the System moves All the User Data to New partition and make the System partition Read Only, There are two ways you can achieve this.
- Manually Typing Command and installing Kexts Old School. (Terminal)
- Use Hackintool for Read / Write and Installing Kexts. (GUI)
You can use any method but make sure that you don’t mess up the Extensions Folder, Use Minimal Set of Kexts which are necessary for boot like (FakeSMC / VirtalSMC, Lilu, WhateverGreen, AppleALC, Broadcomm Bluetooth/WiFi…..) and all other kexts to EFI/Kexts/10.15 or EFI/Kexts/Other for Flexibility, but it is always recommended to Keep all the kexts on EFI/CLOVER/Kexts/Others.
3.1 Ol’ School Terminal method
Step 1: First we have to Disable GateKeeper So fire up the Terminal and type,
sudo spctl --master-disableStep 2: Mount the System Partition as Read/Write.
sudo mount -uwStep 3: Relaunch the Finder,
sudo killall FinderStep 4: Once Done, Head Over to this Link and Download the Kext Utility.
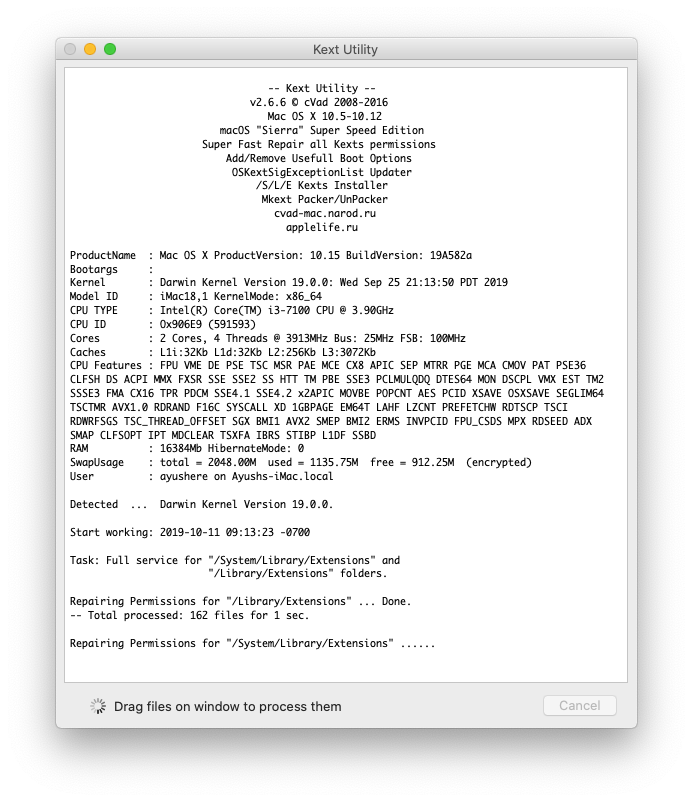
Step 5: Upon Opening it will Repair All the Permissions for S/L/E and L/E
Step 6: Simply Drag and Drop the Kexts, after installing all the kexts Quit the Utility.
3.2 Use Hackintool For Read Write Partition and Installing Kexts.
Step 1: Download Hackintool From this Link.
Step 2: Open Hackintool and Go to Tools Tab.

Step 3: Click on the Little Home Button On the Bottom of the Hackintool Window.

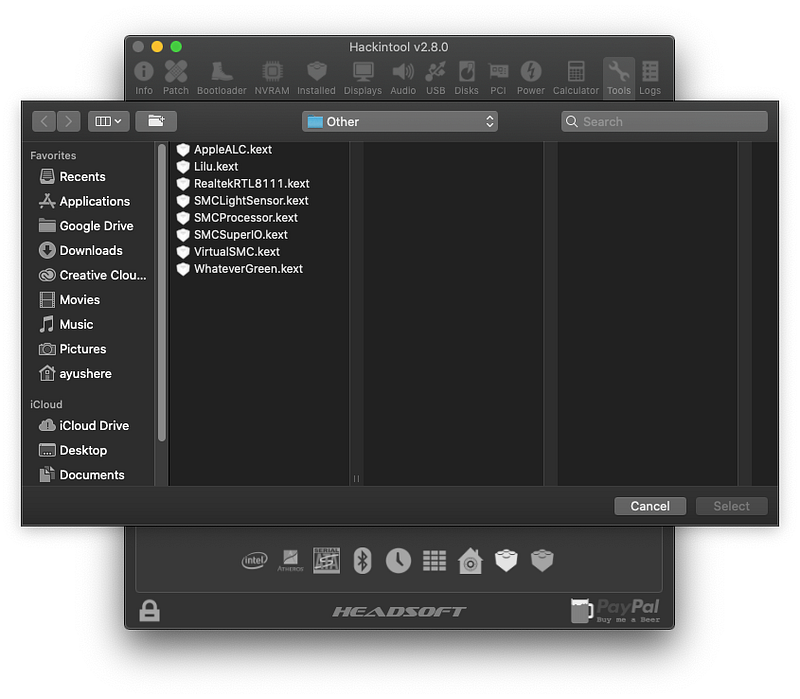
Step 4: Click On Install Kexts Icon, Next to Home(Gatekeeper) Icon and Select the Kexts to Install.

Step 5: After Successful Install It’ll Show something like this,
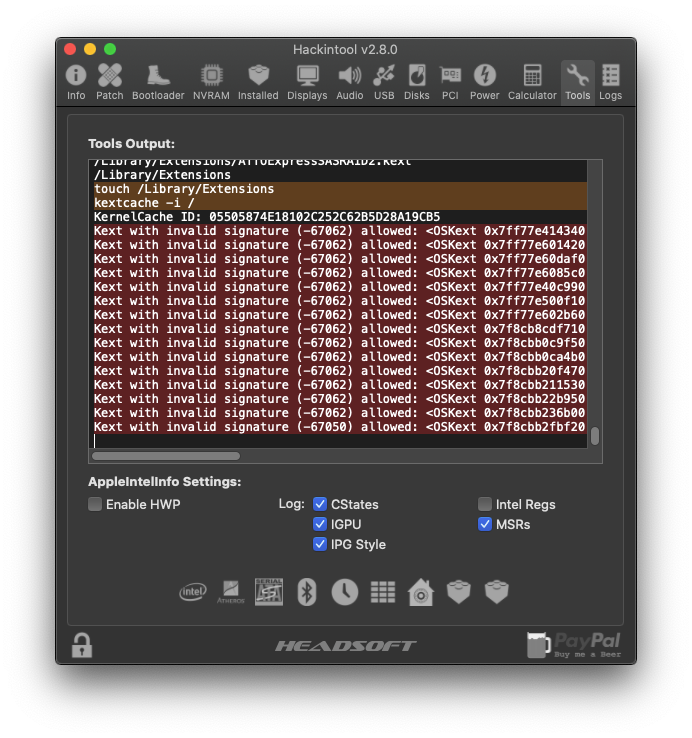
Done!
4. Remove USB Limit from macOS Catalina 10.15
macOS Catalina has many issues and one of them is “if you have too many USB ports like 4 or above” you can’t use them all. so, to remove the USB port Limitation we have to implement a patch from clover or from any plist editor, it was also there in Mojave.

As you can see we only need two patches for Catalina as opposed to four, for Mojave.
Line 1 –
Name*: com.apple.iokit.IOUSBHostFamily
Find*: 83FB0F0F
Replace*: 83FB3F0F
Line 2 –
Name* com.apple.driver.usb.AppleUSBXHCI
Find*: 83F90F0F
Replace*: 83F93F0F
Remember you will need USBInjectAll.kext installed to enable this to work.
Thanks to,
Applelife.ru Vit9696 For EC Implementation
Credits Due to Corpnewt Our Hackintosh Script Wizard.


